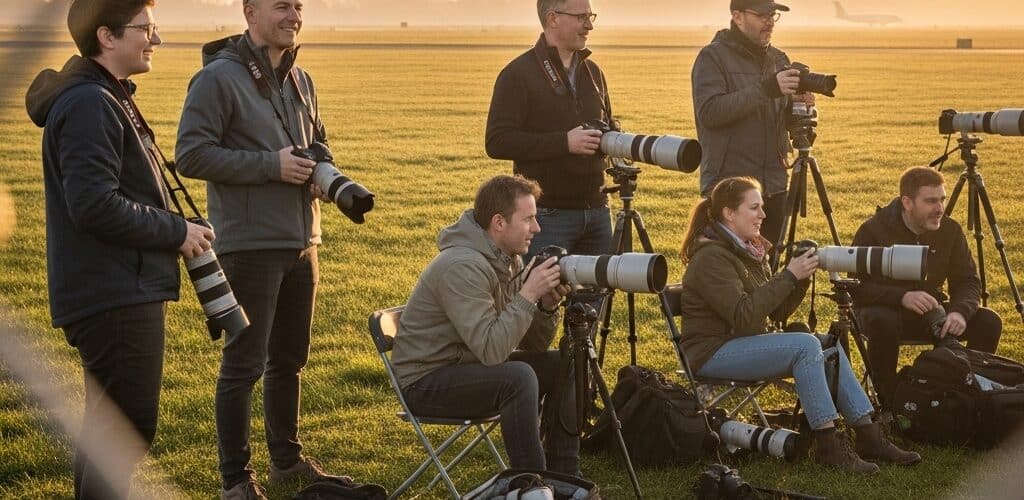
There is a specific moment every plane spotter remembers: the first time a widebody drifts in low overhead, landing lights blazing, gear down, engines spooling back, and you feel the bass of it in your chest before you hear it. That moment is free, it requires no pilot’s license, and it is available at almost any airport in the world. You just have to know where to stand.
Planespotting is one of aviation’s most welcoming entry points. You can start with a smartphone and a curiosity about what just flew over, or you can go deep with a long telephoto lens, a scanner radio, and a logbook tracking every registration you have ever recorded. The rabbit hole is as deep as you want it to be, and the community waiting at the bottom is genuinely enthusiastic about helping newcomers find their feet.
These 25 tips cover the practical foundations: where to position yourself, how to get the light right, which apps and tools make a real difference, and how to build the knowledge base that turns random aircraft into recognizable old friends. Whether you showed up with nothing but a phone or you just unpacked your first camera kit, there is something here to sharpen your next session.
01. Find Your First Spotting Fence
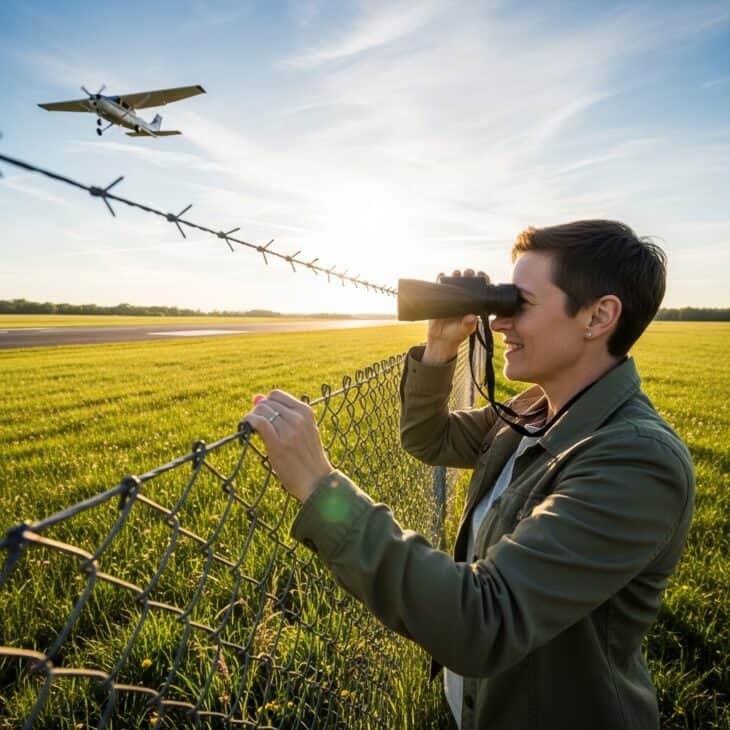
Why it works The perimeter fence at the approach end of a runway is the classic beginner’s position for good reason. Aircraft descend slowly here, they are large in the frame, and the sight lines are clean. Most airports tolerate spotters at public road margins near the threshold, and the experience of watching arrivals from just a few hundred metres away is a completely different feeling from the terminal.
How to get it Use Google Maps to find the runway layout of your nearest airport and identify which end faces the prevailing wind. Planes almost always land into wind, so the approach end is where aircraft will be lowest and slowest. Drive or cycle the perimeter roads to find legal public access points. Bring a jacket even in summer because exposed airfield fences are windier than you expect. Wave at the aircraft if you like: at a small field, a pilot taxiing back might wave right back.
02. Download a Flight Tracking App
Why it works A flight tracking app transforms a session at the fence from passive watching into active hunting. You can see exactly what is inbound, how many minutes away it is, what aircraft type is on the registration, and which airline operated it last. This means you will never miss a rare visitor because you pointed your camera the wrong way. You can identify flights in real time including callsign, origin, and destination, which adds enormous context to every shot.
How to get it Flightradar24 and FlightAware are the two most widely used apps and both have free tiers that are genuinely useful for beginners. Download one before your first session and spend ten minutes at home learning the interface so you are not fumbling with it at the fence. Set a filter for the airport you are visiting and sort by arrival time so you have a rolling countdown to each aircraft. Paid tiers unlock registration history and operator details, which become valuable once you start logging seriously.
03. Learn Aircraft Silhouettes to ID Planes by Shape
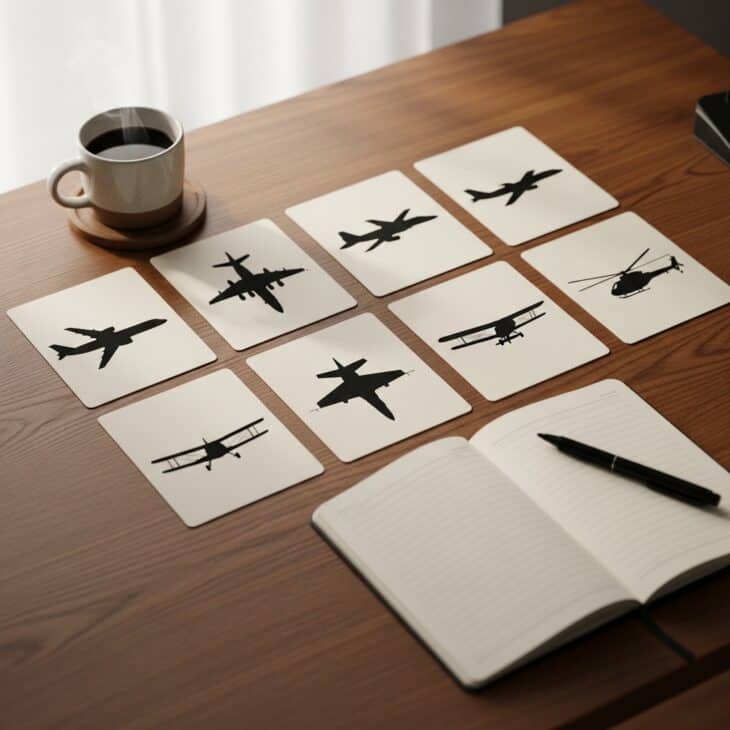
Why it works Learning to read aircraft shapes turns a silver dot in the distance into a recognisable type before it is close enough to read any markings. Engine count and position, wing sweep angle, tail configuration, fuselage width and length, and winglet design are all visible from hundreds of metres away. With practice you will be correctly identifying aircraft types before the app tells you what they are, which adds a satisfying layer of skill to every session.
How to get it Start with the most common types at your local airport and work outward from there. Planespotters.net has a free identification guide and the community forums are full of helpful quizzes. Print or save a small reference sheet for your first few sessions and actively quiz yourself on each approach: guess the type before it gets close, then check your tracking app. Within a handful of sessions the most frequent visitors will snap into place automatically.
04. Choose Camera Gear That Matches Your Budget
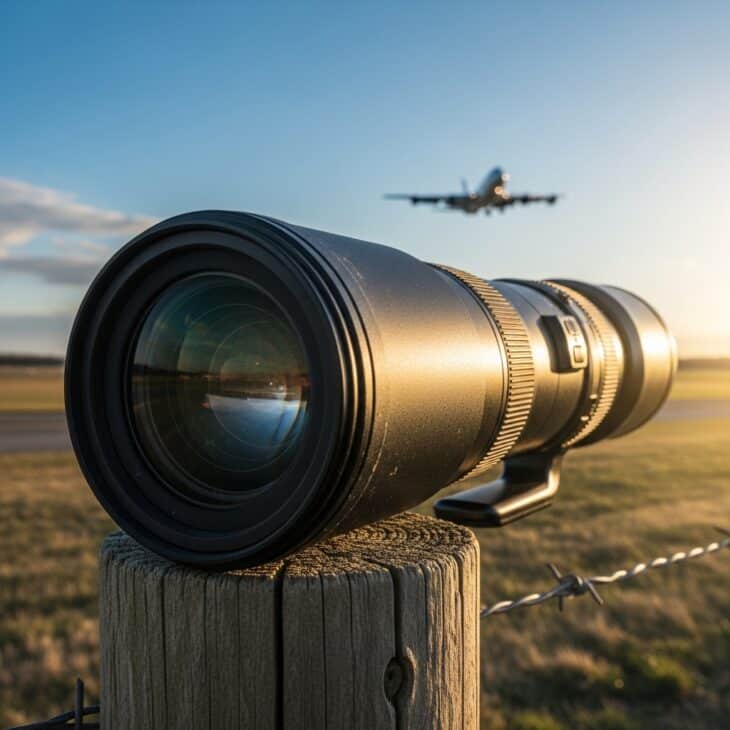
Why it works Aviation photography rewards reach. Aircraft are large subjects but they operate at distances that make shorter lenses frustrating; a plane on final approach at a major airport is typically 300 to 500 metres away at its closest fence-accessible point. That said, the best gear is the gear you already have. A modern smartphone shoots surprisingly capable aviation images in good light, and a mid-range bridge camera with a long zoom gets you substantially further for well under the price of a dedicated telephoto kit.
How to get it If you are starting from scratch, a used bridge camera with a 60x optical zoom will cover most beginner scenarios and costs a fraction of a DSLR and telephoto combination. If you already shoot with a mirrorless or DSLR body, a used 100-400mm zoom is the sweet spot for airport work: enough reach for approach shots, light enough to handhold for departures. For smartphone shooters, position yourself as close as legally possible to the threshold and use burst mode to capture the brief window of each aircraft at its nearest point.
Gear tip
You do not need to buy anything before your first session. Go once with your phone, learn what the light does and where the aircraft track, and then decide what reach you actually need based on your specific airport’s geometry.
05. Chase the Golden Hour for Dramatic Landing Shots
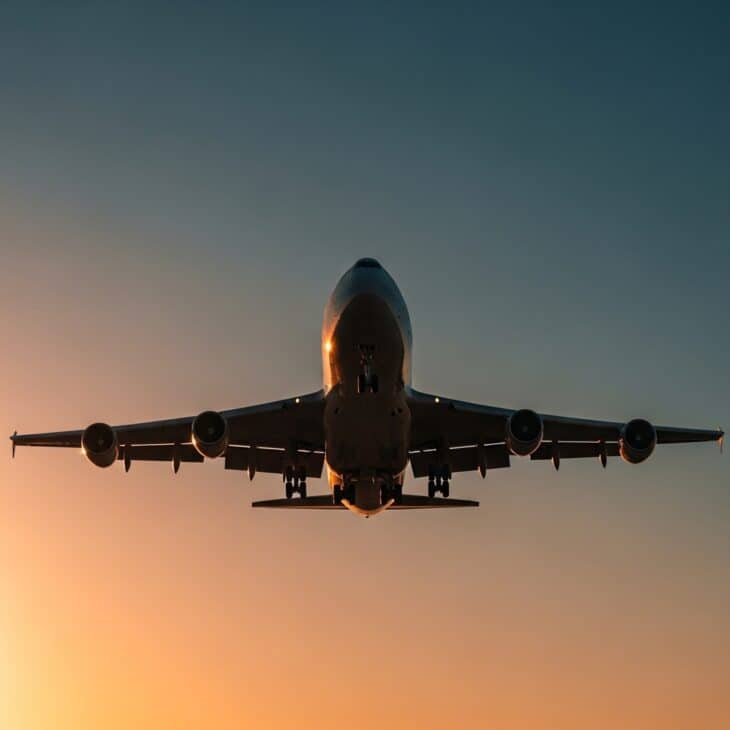
Why it works The hour after sunrise and the hour before sunset transform ordinary aviation photography into something cinematic. The low sun angle wraps light around curved fuselages in a way that midday overhead light never achieves, shadows deepen, and even a routine narrowbody looks like a painting. Most airports have a dedicated spotting forum that tracks which fence locations face the sun at these times, because the direction matters enormously.
How to get it Use a free sun-angle app like PhotoPills or The Photographer’s Ephemeris to check exactly where the sun will set relative to your planned position. You want the sun behind your left or right shoulder so aircraft landing toward you are lit from the front. Arrive 30 minutes before golden hour starts so you have time to compose and check settings before the light peaks. The window is narrow, typically 20 to 30 minutes of truly spectacular quality, so have everything ready before it begins.
06. Check Wind Direction to Find the Active Runway
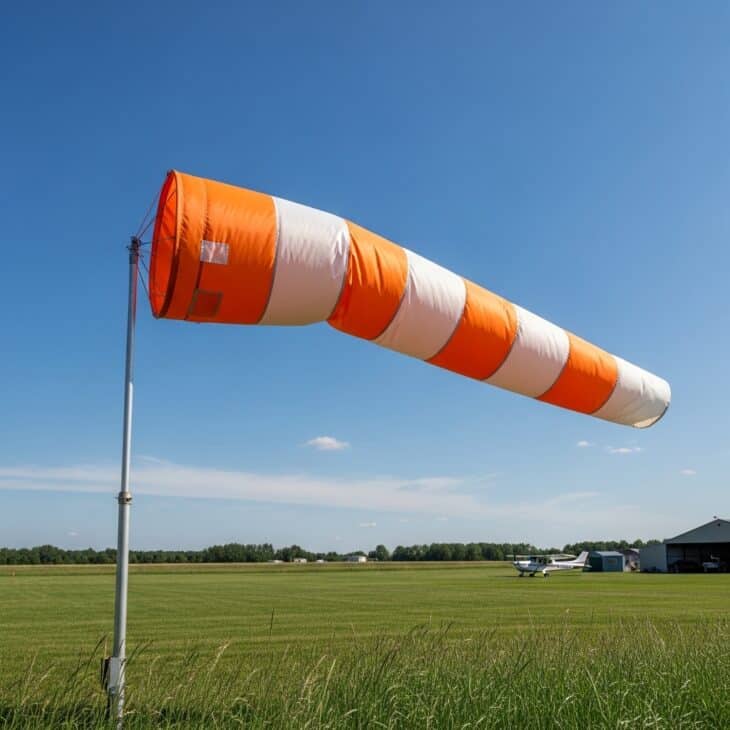
Why it works Aircraft always take off and land into the wind. Knowing which runway is active tells you exactly which fence line will give you nose-on arrivals and departures, and therefore where to position yourself for the closest and most dramatic shots. Heading to the wrong end of an airport is a common beginner mistake, especially at larger airports where the active runway can change mid-session as conditions shift. You can check live weather reports (METAR) online to see which runway is in use before you drive anywhere.
How to get it METAR reports for every civil airport are freely available and include the wind direction and surface observation. The runway in use will almost always face into the reported wind within about 30 degrees. A quick check on your tracking app also shows the direction traffic is arriving: look at several consecutive inbounds and you can see immediately which way the flow is running. On calm days with winds under around 5 knots, the active runway may be chosen by preference or by the direction of the previous departure, so it is worth arriving a few minutes early to observe the first few movements before committing to a position.
07. Tune Into Live ATC Audio
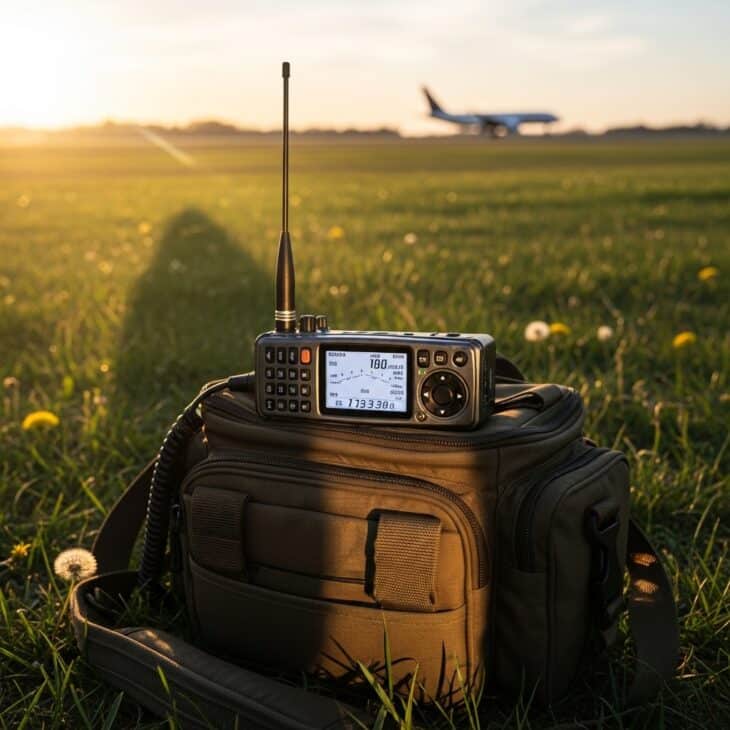
Why it works Listening to air traffic control communications changes the experience from watching to participating. You hear the callsigns, the instructions, the handoffs between frequencies, and the occasional interesting exchange that tells a story no camera could capture. You will also hear the next arrival called in before it is even visible on the horizon, giving you time to position and focus. For beginners it is the fastest way to start understanding how airports work as connected systems. A good aviation handheld radio lets you monitor the approach, tower, and ground frequencies simultaneously.
How to get it If you are not ready to invest in a radio, LiveATC.net streams ATC audio for hundreds of airports worldwide, free and browser-based. The delay is around 30 seconds, which is short enough to be genuinely useful during a session. When you are ready to go live, a mid-range handheld aviation receiver covers all civil VHF frequencies and most spotters use them without a licence in a receive-only mode (check local regulations). Tune the tower frequency and the approach frequency for the airport you are visiting; you will find both listed in airport information databases online.
08. Master the Exposure Triangle for Moving Aircraft
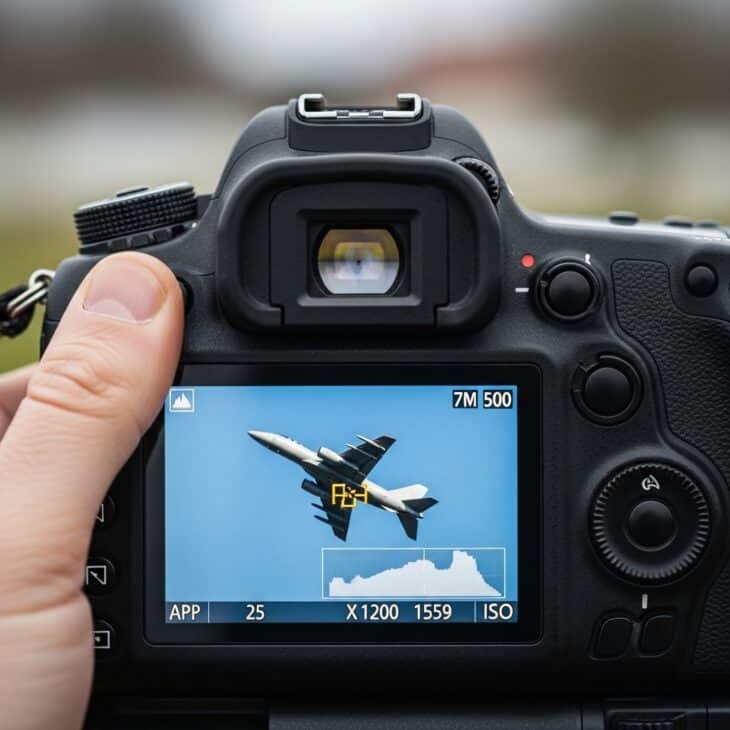
Why it works A blurry aircraft is a wasted aircraft, and aircraft move fast even when they look slow from the ground. On final approach a jet is typically travelling at 140 to 160 knots, meaning a shutter speed that would freeze a walking person will still blur a plane into mush. Learning to balance shutter speed, aperture, and ISO to get consistently sharp images in varying light is the single biggest technical skill you can develop, and it pays off immediately in the quality of your keepers.
How to get it Start with shutter speed priority mode and set 1/1000 second as your baseline for aircraft on approach. For propeller aircraft, 1/500 to 1/800 second gives you a prop blur that shows movement rather than freezing the blades into a static disc, which looks more dynamic. In strong midday light your camera can handle a narrow aperture and low ISO; in overcast or low-light conditions push the ISO before you drop the shutter speed. After each session review your rejects and check what shutter speed the blurry ones were shot at: that feedback loop will calibrate your instincts faster than any tutorial.
09. Study the Airport Layout Before You Visit

Why it works Arriving at an unfamiliar airport without knowing the layout is like arriving at a football stadium without knowing where the pitch is. You need to understand which runways are in use, where the access roads run in relation to the thresholds, where the public viewing areas are if any, and what obstructions sit between you and the flight path. Understanding airport taxiway markings and layout also helps you narrate what you are watching, which is especially satisfying when you start attending airshows or sharing commentary with other spotters.
How to get it Google Maps satellite view is your starting point. Zoom into the airport and trace the perimeter roads to identify which sections are public. Look for car parks, picnic areas, and road margins that sit directly under the approach path. Cross-reference with dedicated spotting sites like SpottingGuide.com, which lists verified positions for hundreds of airports worldwide with GPS coordinates, notes on the sun angle at different times of day, and community reviews. Save a few screenshots to your phone so you have them offline during the visit.
10. Build a Spotting Kit for Long Sessions
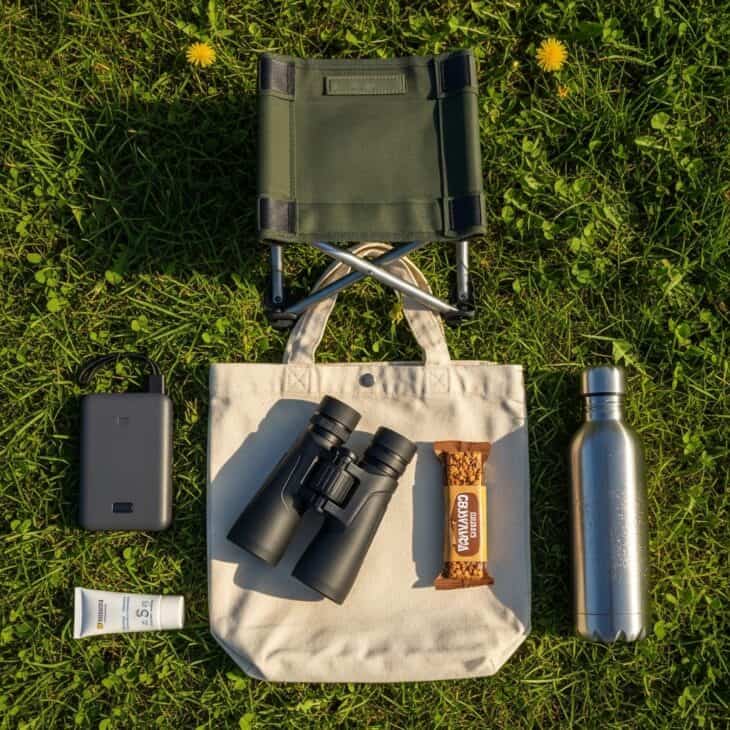
Why it works Spotting sessions routinely run three to four hours once you get absorbed in the traffic flow, and an exposed airfield perimeter is not comfortable unprepared. Wind, sun, cold, and standing on concrete all compound over time. Spotters who arrive with a chair, snacks, water, and sun protection stay longer, shoot more, and come back again. Binoculars are also a genuine game-changer for picking out aircraft markings and identifying types before they get close, and a charged battery pack means your phone and radio never die mid-session.
How to get it A lightweight folding camp chair is the single most comfort-improving addition to any spotting kit and costs almost nothing. Pack water and a snack regardless of how short you think the session will be, because interesting traffic has a way of appearing just as you are about to leave. A compact set of 8×42 binoculars gives excellent reach and brightness for the price. Keep a USB battery pack charged at home and throw it in the bag automatically so it is always there when you need it. A small first aid kit and insect repellent round out a kit that handles most conditions.
What to wear
Dress for the wind, not the temperature. An exposed airfield perimeter can be 5 to 10 degrees colder than nearby streets because there is nothing to block the wind. A packable windproof layer takes almost no space and makes a huge difference.
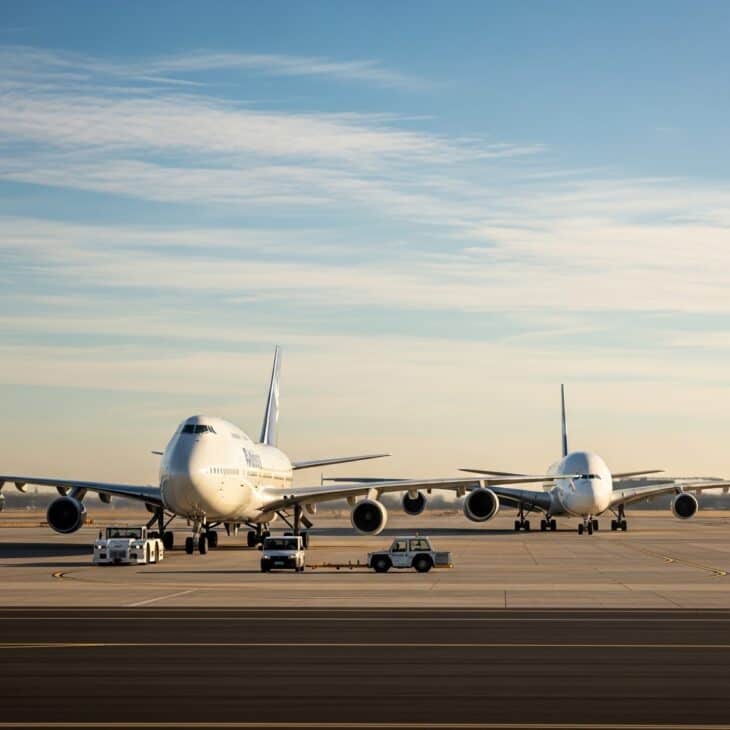
11. Track Airline Schedules for Peak Widebody Traffic

Why it works Not all airport traffic is equally exciting. If you want to see widebody jets, long-haul aircraft, or specific operators, you need to know when they arrive and depart. Long-haul flights from North America and Asia tend to arrive at European hubs in the morning; outbound long-haul typically pushes back in the afternoon or evening. Planning your session around these windows means the ratio of interesting aircraft to routine short-haul is dramatically higher, especially at large hub airports. Check the busiest airports for the widest variety of traffic.
How to get it Your flight tracking app’s airport page will show a full day’s arrivals and departures, usually with aircraft type included. Scan the list the evening before your session and identify the window with the most interesting traffic. Flightradar24’s airport page lets you filter by aircraft type, so you can quickly see when the widebodies are due. Some spotting forums maintain airport-specific guides that list recurring interesting operators by day of week, which is extremely useful for planning sessions around specific wishlist aircraft.
12. Join an Online Planespotting Community
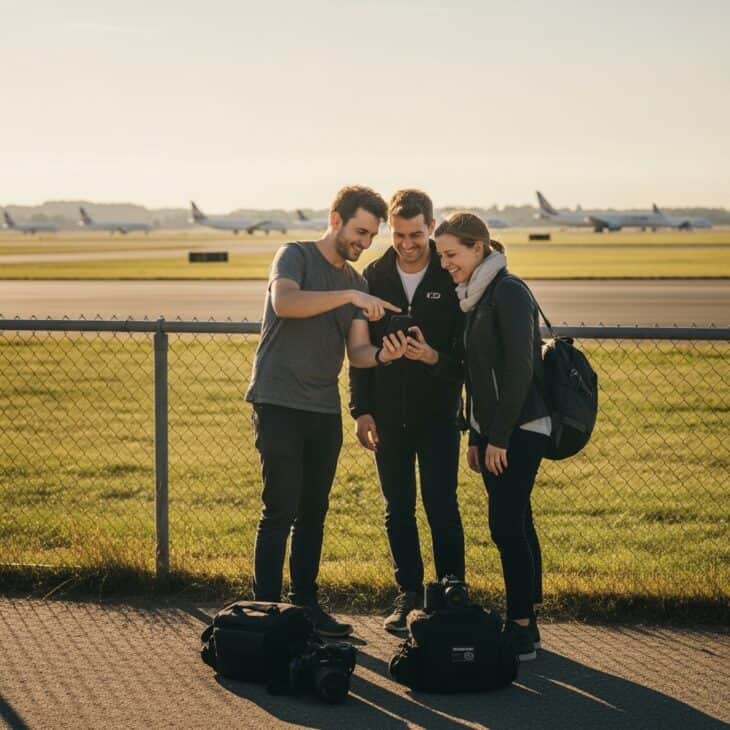
Why it works The planespotting community is exceptionally generous with local knowledge. Established spotters know the exact gate a particular operator uses, the fence position that gives the cleanest view, and the times of week rare types come through. Online communities on dedicated sites, Reddit aviation groups, and Facebook spotting pages are full of people who enjoy answering beginner questions and who regularly share advance notice of interesting movements. Connections made online very often lead to real-world sessions with experienced spotters who can teach more in an afternoon than any guide.
How to get it Planespotters.net is the central hub for the community: it has a forum, photo archive, and airport-specific sub-communities for most major airports. Reddit’s r/aviation and r/aviationphotography communities are active and welcoming. Facebook has local spotting groups for most airports that post live alerts when something unusual is on approach. Start by commenting and asking questions before you start posting shots; most communities respond well to genuine curiosity, and learning what others look for expands your own idea of what is worth photographing.
13. Shoot Arrivals from Beyond the Threshold
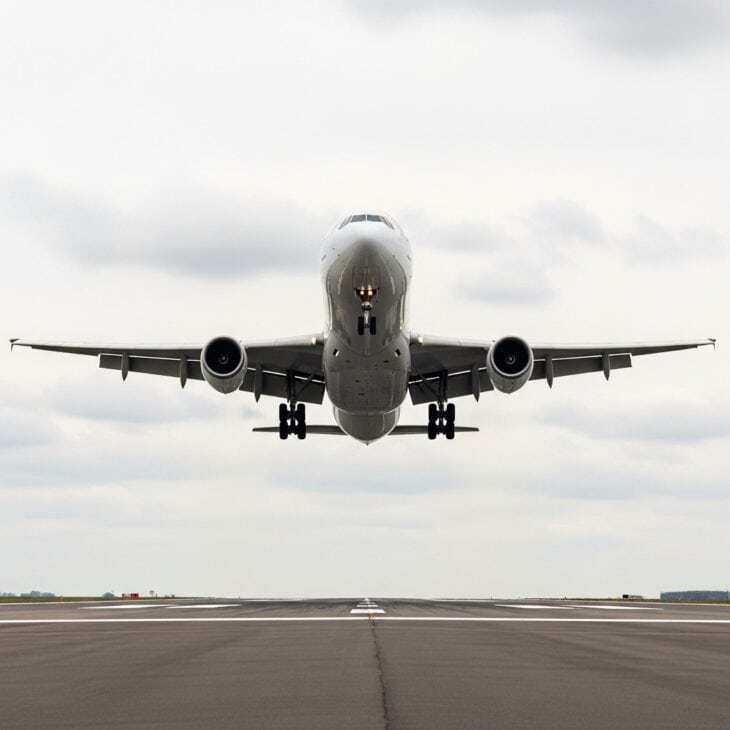
Why it works Positioning yourself beyond the threshold rather than at the fence line means aircraft are flying toward you as they descend, which produces a classic head-on three-quarter view with gear and flaps on full display. This is the most dramatic angle in standard spotting photography because it captures the aircraft at its most complex configuration, most loaded with detail, and closest to the camera position. The compressed perspective also makes the aircraft look enormous relative to any ground features in the frame.
How to get it Identify a legal public access point that sits on the extended centreline of the runway, beyond the threshold but still within a reasonable focal length for your gear. Many airports have public roads that run under or alongside the approach path, and some have dedicated spotting mounds or car parks in this position. Shoot in continuous burst mode because the aircraft moves through the ideal framing window in a matter of seconds. Use autofocus with continuous tracking mode if your camera has it, and aim for the nose cone as your focus point to keep the cockpit and forward fuselage sharpest.
14. Use Overcast Light for Even Fuselage Shots
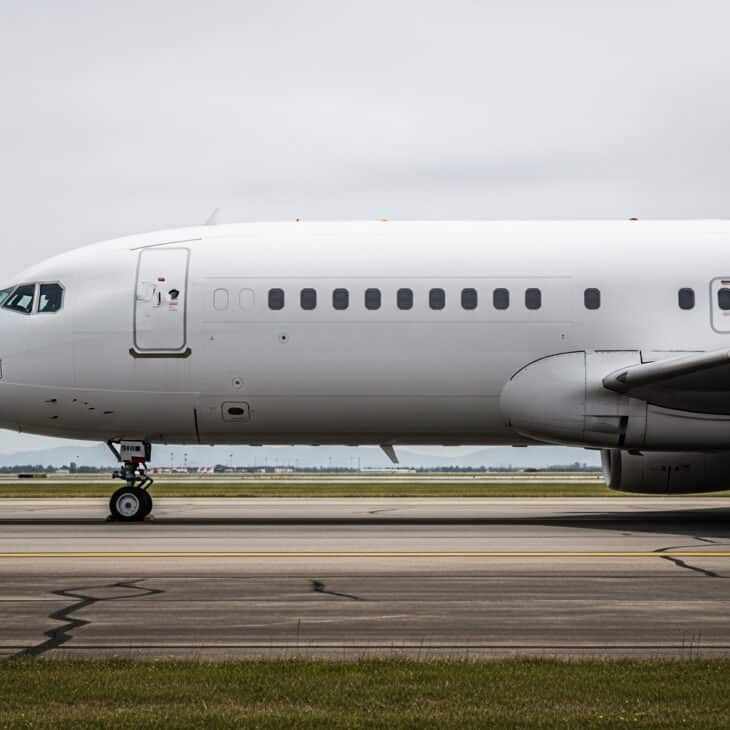
Why it works New spotters quickly discover that bright sun creates problems as often as it solves them. Hard shadows fall across fuselages from engine pylons and wings, cockpit windows blow out to white, and the difference in brightness between the lit side and the shadowed underside challenges any camera’s dynamic range. An overcast sky acts as a giant softbox, wrapping diffuse light around the aircraft from all directions and producing technically superior documentation shots where every livery detail is visible. Professional aircraft identification photographers specifically prefer overcast days for this reason.
How to get it Do not cancel a spotting session because of cloud cover. Reframe your expectations: overcast days are for clean profile shots and side-on taxiway captures rather than dramatic golden-lit landing sequences. Position yourself at a taxiway viewing area where aircraft move slowly at close range, and use the even light to capture full-length side profiles with every element exposed correctly. These shots are often the most useful for identification and logging purposes, and they are extremely difficult to replicate on a sunny day regardless of how well you expose for them.
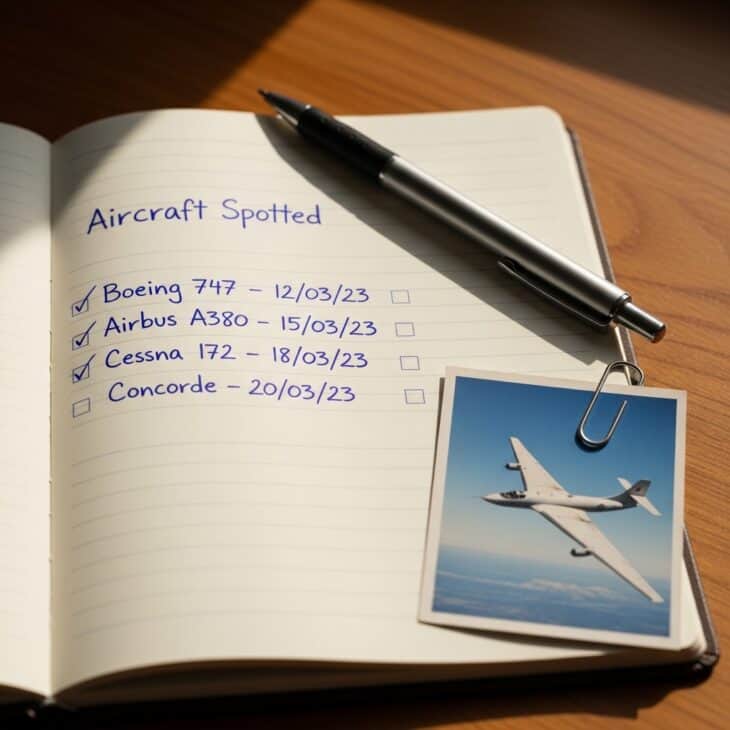
15. Start a Spotting Log
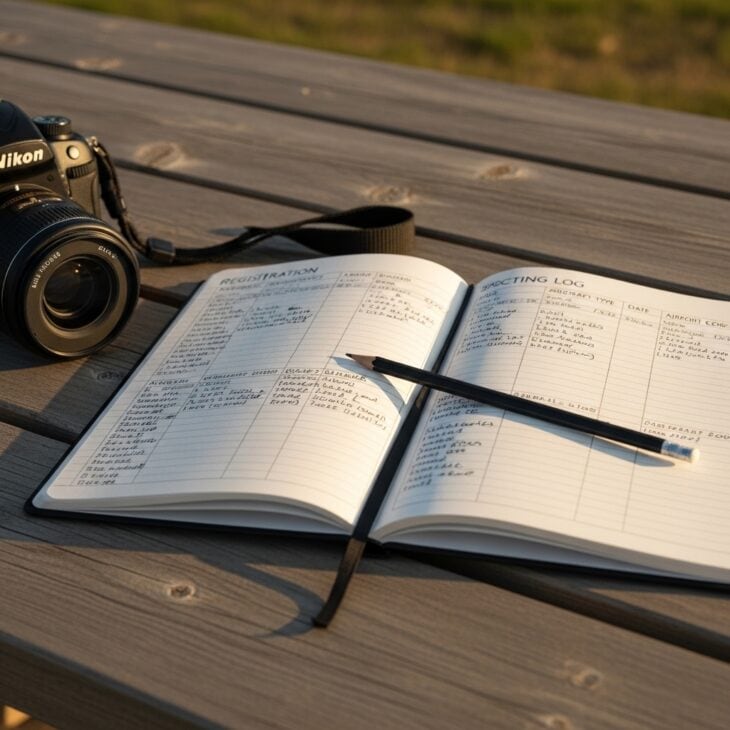
Why it works Logging transforms spotting from a series of disconnected sessions into a running record of everything you have ever seen. Over time your log becomes a genuinely interesting document: first sightings of particular types, rare visitors, the same aircraft seen years apart, the gradual retirement of older types from your home airport. Understanding how tail numbers work is the foundation of a useful log, because registration codes carry nationality, operator history, and sometimes fascinating ownership stories. Many long-term spotters regard their log as the defining artefact of the hobby.
How to get it A simple notebook with hand-ruled columns is all you need to start. Note the date, airport, registration if visible, aircraft type, and operator for each aircraft you photograph. Digital alternatives include Plane Finder’s log feature and community tools on Planespotters.net where you can link your sightings to aircraft history records. If you log digitally, export a backup periodically: a log built over years is not something you want to lose to an app going offline. Even a modest first session will produce a list of a dozen registrations that you can cross-reference for ownership history when you get home.
16. Try Night Spotting for Light-Trail Images
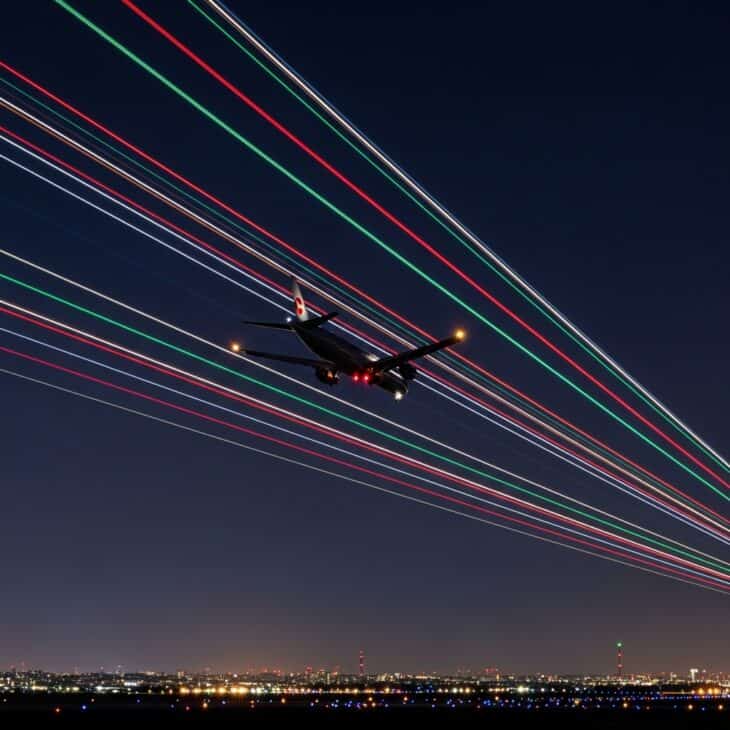
Why it works Night spotting produces a completely different genre of image from daytime work. Long exposures of 2 to 4 seconds capture the movement of navigation lights as coloured trails while the aircraft itself renders as a ghost. The city glow provides context and colour. These images work beautifully because they communicate the drama of flight in a way that standard documentation shots cannot: pure motion, light, and atmosphere. Many spotters who started with daytime photography find night work becomes their favourite output.
How to get it You need a tripod and a camera with manual mode; smartphones with a dedicated long-exposure or light-trail mode can also produce excellent results. Set a shutter speed between 2 and 6 seconds, narrow the aperture to f/8 or f/11, and use ISO 200 to 400 to keep noise low. Trigger the shutter with a remote or the camera’s self-timer to avoid shake from pressing the button. Use your tracking app to time the exposure to the moment an arrival is in the frame, and experiment with multiple exposure lengths to find what gives you the most readable trail length for your airport’s distance to the threshold.
Safety note
Night spotting at airport perimeters is legal at public access points, but always be visible to passing traffic if you are near a road. Wear a reflective vest and use a red light rather than white to preserve your night vision.
17. Attend an Air Show for Up-Close Access
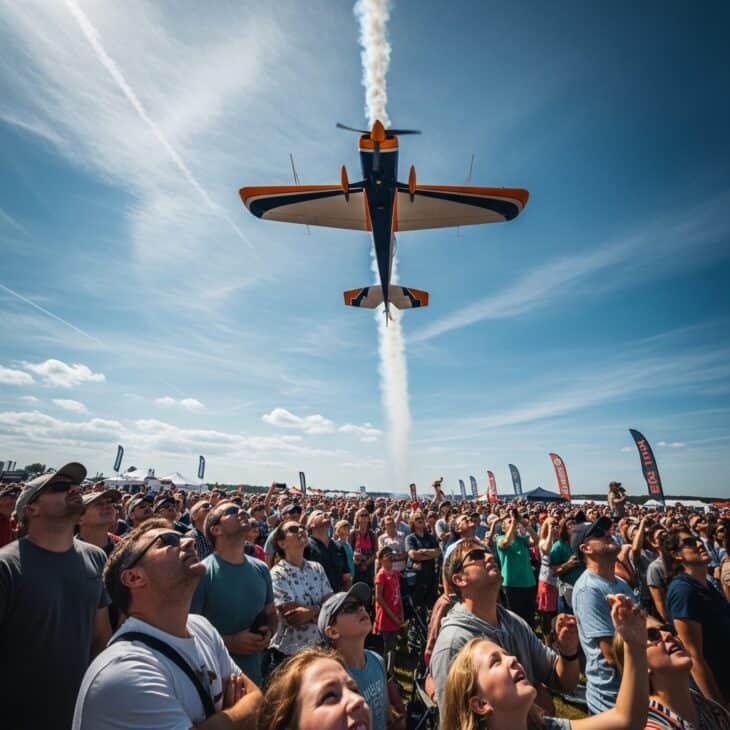
Why it works Air shows offer something no fence-line session can match: legal ramp access, static displays you can walk around and photograph from any angle, and display flying that brings aircraft to within a few hundred metres of the crowd. You can fill a frame with a historic bomber, examine cockpit interiors on open-door static displays, and meet pilots who are genuinely happy to talk about their aircraft. For beginners, air shows are one of the fastest ways to build knowledge and shoot a variety of types in a single session. There are excellent air shows across the country throughout the spring and summer season.
How to get it Research air shows within driving distance for the current season. Most major shows are announced three to six months in advance and publish detailed schedules including static display participants. Arrive early: static display areas fill up and the best photography angles disappear as crowds grow. Bring a wide-angle lens or a short zoom in addition to your telephoto, because static displays reward close-up detail shots that a long lens cannot frame. Many shows offer a dedicated photographers’ enclosure at a premium ticket price that gives unrestricted shooting positions along the crowd line.
18. Use ADS-B Data to Catch Rare Visitors

Why it works ADS-B (Automatic Dependent Surveillance-Broadcast) is the transponder system that feeds every flight tracking app in real time. Beyond showing you what is airborne right now, the data lets you trace inbound aircraft from hundreds of kilometres out, identify unusual routing that suggests a diversion or ferry flight, and spot operator codes that indicate military, government, or cargo types that do not appear in regular airline schedules. Spotters who monitor ADS-B data closely catch rare visitors that others miss because they are already at the fence when the unexpected arrival rolls in.
How to get it Flightradar24’s filter system lets you select specific aircraft types, operator prefixes, or departure airports. You can also set alerts for specific registrations if there is an aircraft you want to catch. The community on aviation forums often posts advance notice of interesting movements based on ADS-B tracking: a government aircraft spotted repositioning across country, or a rare type making a technical stop. Follow the relevant airport thread on spotting forums and check for movement alerts the night before and morning of your planned session. A combination of forum alerts and personal app monitoring covers most scenarios.
19. Learn Airline Liveries at a Glance

Why it works Recognising airline liveries on approach is one of the most satisfying skills in spotting because it works at distances where registrations are invisible and even aircraft type can be ambiguous. The combination of colour scheme, tail logo style, and fuselage stripe pattern uniquely identifies each operator. Once you have the major carriers locked in for your region, you start to notice the subtler differences: the exact shade of a particular blue, the position of a cheatline relative to the windows, the livery variations between different generations of aircraft in the same fleet.
How to get it Make a point of identifying the livery on every approach shot before you check the app. Over two or three sessions at your home airport the most frequent operators will become automatic. For less common visitors, airline Wikipedia pages have excellent livery photos and a brief note on what is distinctive about each scheme. When an aircraft you cannot identify comes in, photograph it first and look it up later: the research session afterward is often more educational than any guide because you are solving a specific puzzle with a specific image in front of you.
20. Scout Elevated Vantage Points Near Airports
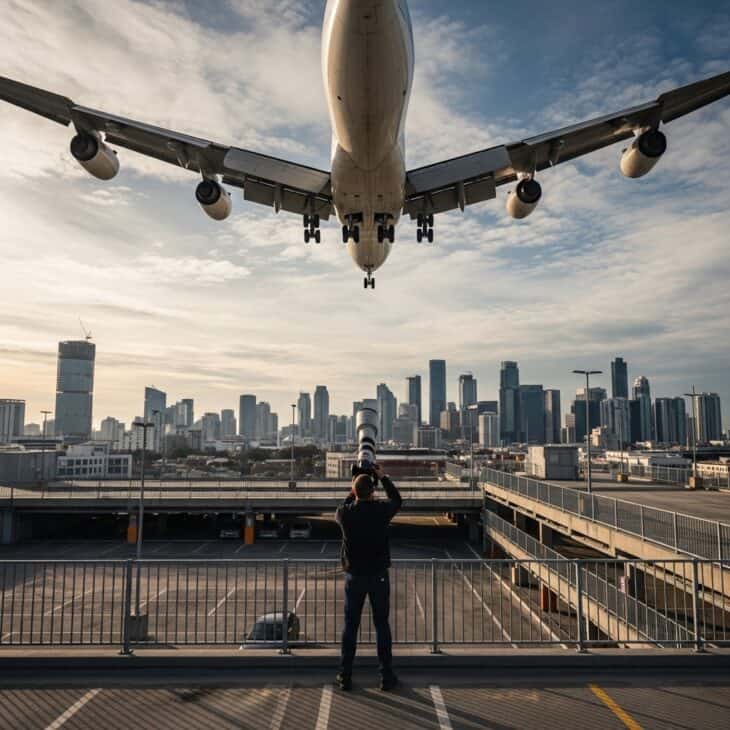
Why it works Height dramatically changes the geometry of aircraft photography. From ground level you shoot up at aircraft and the sky is your background. From an elevated position you can shoot on a level plane with arriving aircraft or slightly down at them, which gives a different perspective on the aircraft’s upper surfaces and produces a cityscape or landscape background instead of plain sky. Open-air car parks near major airports are a classic elevated spotting position precisely because they require no permission, offer clear sight lines, and provide wind shelter on lower levels.
How to get it Study the approach path to your target runway and identify any public multi-storey structures that sit under or alongside it. Hotels, airport car parks, and commercial parking facilities near airports often have open upper levels with excellent views. Check the height of any nearby obstacles on Google Street View before committing to the drive. Hill and embankment positions near airports also work well, particularly for shots of departing aircraft where a higher angle lets you see the aircraft against the horizon rather than lost in the sky.
21. Shoot Through Chain Link at Wide Aperture

Why it works A chain-link fence is the defining obstacle of airport photography, and the technique for making it disappear is one of the first practical skills every spotter should learn. When you place your lens close to or touching the fence and shoot at a wide aperture (f/4 or wider), the fence is so far inside the depth of field that it renders as near-invisible blur. The lens sees through the gaps in the mesh rather than focusing on the metal, and the wide aperture compounds the effect by keeping only the distant aircraft in focus. The result is a clean shot with no fence visible at all.
How to get it Press the front of your lens hood directly against or as close as possible to the fence. Make sure a gap in the mesh sits in front of the lens element rather than a wire. Set your aperture to its widest setting, f/1.8 to f/4 depending on your lens, and focus on the aircraft. Take a test shot and zoom in at 100 percent to check whether the fence is visible: if you can still see a grid pattern, move the lens closer to the fence or open the aperture wider. This technique works with most standard fence mesh sizes and is the reason many spotting photographers deliberately choose faster lenses with wider maximum apertures.
22. Visit Cargo Hubs for Freighters
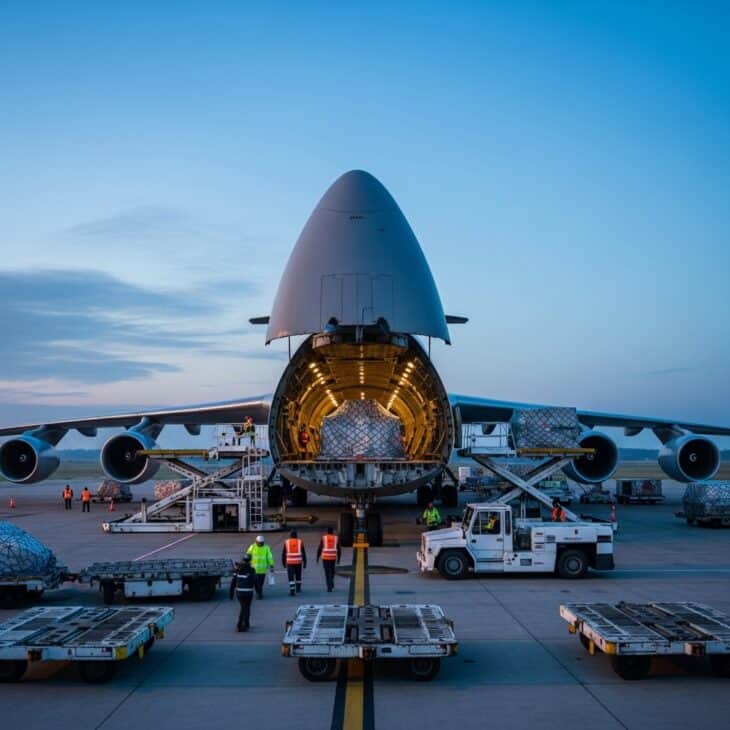
Why it works Cargo airports operate on a completely different schedule from passenger terminals and attract aircraft types that most spotters rarely see. Dedicated freighter conversions of retired passenger types, specialist large cargo carriers, military transport contractors, and charter operators all appear regularly at freight hubs. Because cargo operations often peak overnight and in the early morning, a session timed for the pre-dawn arrival push at a cargo-heavy airport can produce a completely different catalogue of aircraft than a passenger terminal visit, even if the two airports are in the same city.
How to get it Identify the primary cargo airports serving your region: many major cargo operators use secondary airports rather than main passenger hubs. Filter your tracking app by cargo operator prefixes to see the volume of freighter traffic. Arrive before dawn if the cargo push runs overnight: the window of activity is often intense for two to three hours then quieter during the day. Perimeter access at cargo airports varies widely, so check the spotting community forums for verified positions before your visit.
23. Capture Ground Movement from Taxiway Views
Why it works Aircraft on the ground move slowly enough to compose and photograph carefully, which makes taxiway positions ideal for practising exposure settings, framing, and livery documentation. The low angle of a taxiing aircraft also shows the full profile in a way that flight shots rarely do, and the relationship between aircraft scale and ground vehicles gives each image a strong sense of size. Many experienced spotters rate their best taxiway shots alongside their best landing images, because the ground environment provides context that blank sky never offers.
How to get it Some airports have official spotting terraces adjacent to taxiways where aircraft pass at eye level just metres away. If your airport has one, use it: the experience of a widebody passing at that range is genuinely impressive. For airports without dedicated terraces, identify any public roads, car parks, or footpaths that run parallel to a taxiway and check the spotting community resources for confirmed sight lines. A longer focal length compresses the perspective beautifully for taxiway shots, making the aircraft appear to fill the frame even from a distance.
24. Build a Spotting Wishlist and Chase Specific Aircraft
Why it works A wishlist transforms spotting from a passive hobby into an active quest. When you have specific aircraft you want to photograph, every session has a purpose beyond the general satisfaction of being at the fence. The pursuit of a wishlist entry drives better preparation: you track inbound movements more carefully, you research the operating history of target aircraft, and you plan trips specifically around movements you could not see at home. Some spotters maintain wishlists that span decades and continents, planning holidays around the location of particularly rare aircraft. Understanding aircraft type designations is essential for building and reading a meaningful wishlist.
How to get it Start your wishlist with types you have heard of but never seen: a specific variant of a common type, a classic aircraft still in service, or a cargo freighter conversion you have only seen in photos. Use planespotters.net to look up aircraft histories and find out where each type currently operates regularly. Cross-reference with your home airport’s traffic to identify which entries you might realistically see without travelling. For aircraft that require a trip, the spotting community can advise on the best location and timing; chasing a wishlist entry to a new airport is one of the great pleasures of the hobby.
25. Find Your Local Spotting Group
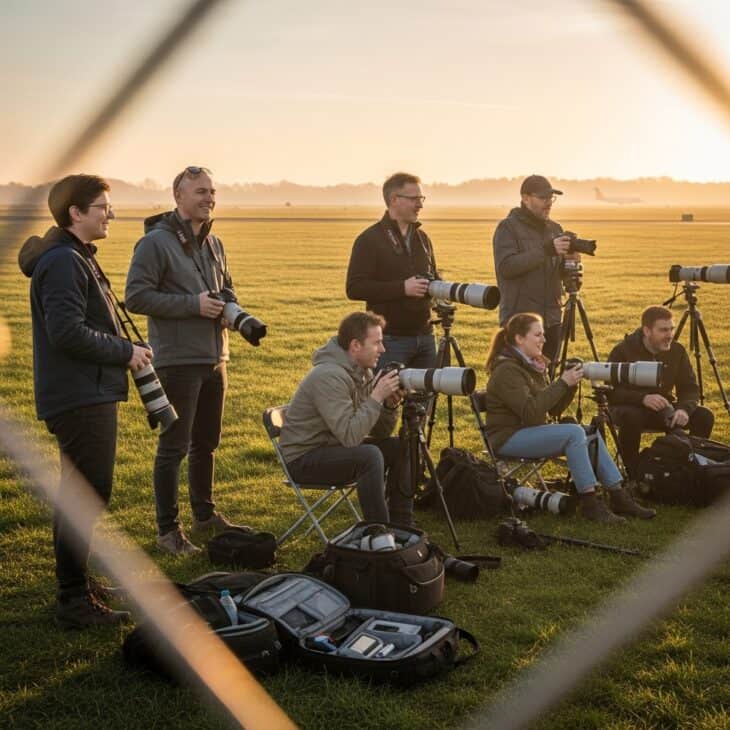
Why it works Aviation is a social hobby disguised as a solitary one. Most experienced spotters at your local airport will know things you do not: where to stand for a crosswind runway, which gate a particular operator always uses, the history of an aircraft that just taxied past, and the story behind the unusual marking on a tail. Finding the group of regulars at your home airport accelerates every aspect of the learning curve and turns individual sessions into shared events. The community also provides informal mentorship on camera technique, equipment, and the ethics of the hobby in ways that no guide can replicate.
How to get it Search for your airport’s name in conjunction with “spotters” or “aviation enthusiasts” on Facebook, and check the relevant threads on national aviation forums. Many UK, European, and Australian airports have established spotter groups that meet regularly and post on dedicated social media pages. In the US, local EAA (Experimental Aircraft Association) chapters often include plane spotters among their membership. If you cannot find a group, the community you need may be just two or three regulars at a fence who have never formally organised: introducing yourself at the fence on a busy morning is almost always met with a warm response and an invitation to join the next session.
About the Author

Hanna writes AeroCorner's aviation-lifestyle and decor guides, turning a love of flight into ideas for your home, celebrations, and gift lists.