

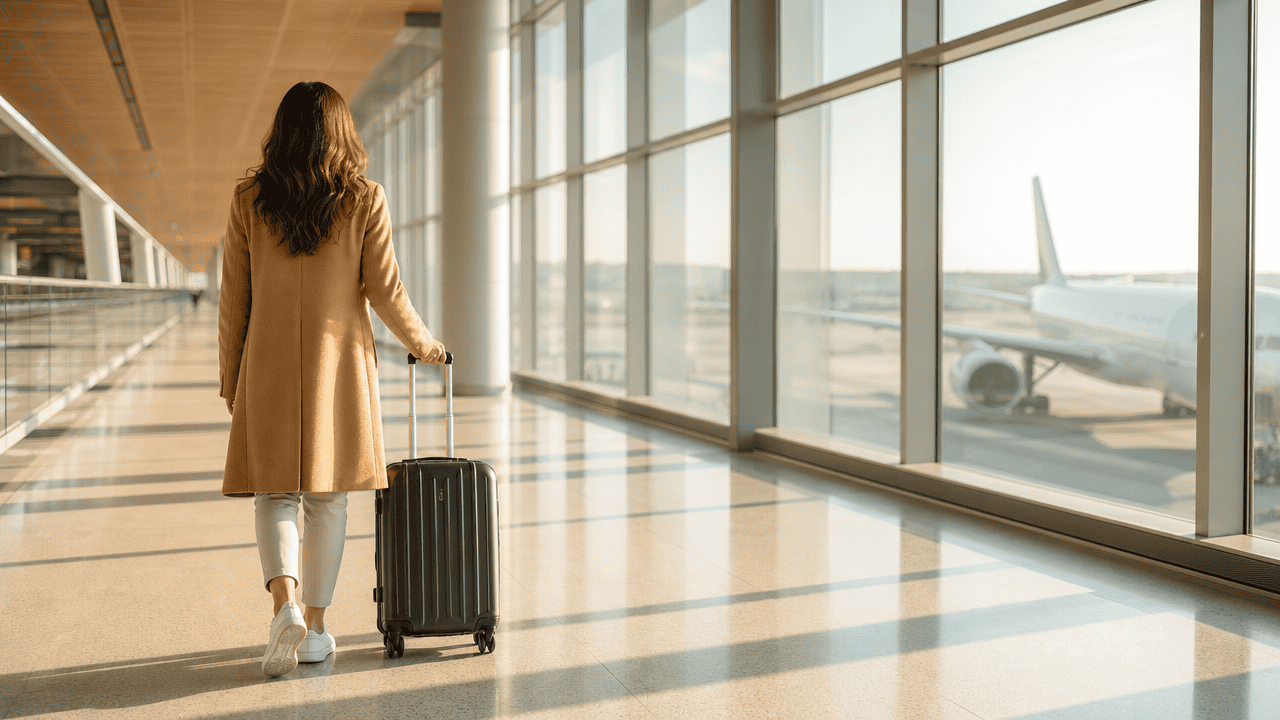
The airport is the first location of any trip, and it usually gets skipped. Most people take one blurry photo of a boarding pass and then wait for the beach. That is a missed set of frames, because a terminal is full of clean light, long lines, big glass, and a feeling of about-to-leave that never quite comes back later.
The shots below are built around what an airport actually gives you: backlit gate windows, mirrored floors, moving walkways, departure boards, and wide empty concourses at odd hours. Some are quick candids a travel companion can grab in ten seconds. Others are worth arriving early for.
Skim for the ones that fit your trip, your travel group, and the time your flight leaves. A red-eye and a mid-morning departure produce completely different photos in the same building. Save three or four as a shot list and you will walk out of the terminal with a real opening scene.
01. The Departures Board Look-Up
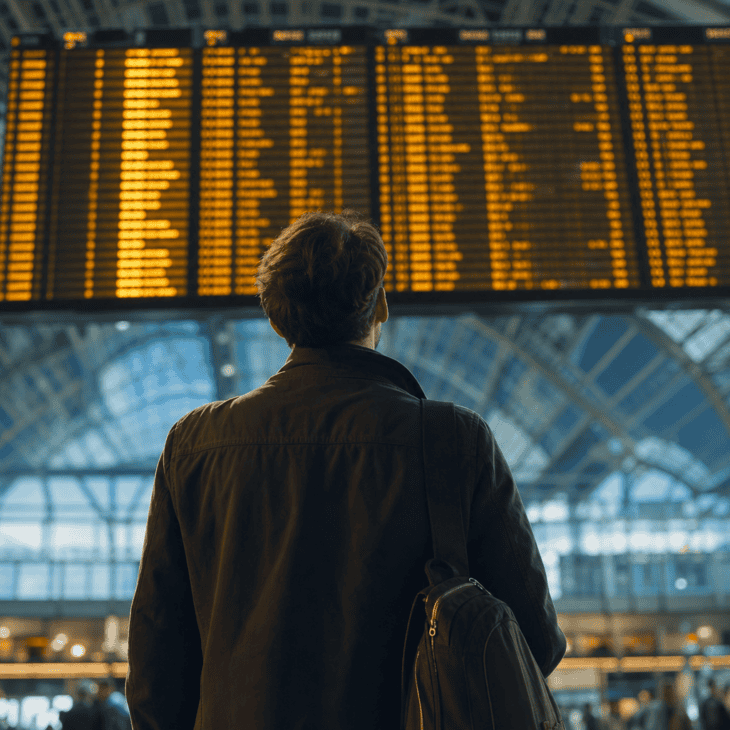
What it is A vertical or wide frame taken from behind and slightly below the subject, who stands looking up at the big overhead flight information display. The board fills the top third, the traveler anchors the bottom, and the destinations stay soft rather than pin sharp.
Why it works Shooting from behind turns a posed photo into a scene, because the viewer reads it as a real moment of deciding where to go. The glow of the board also lights the back of the subject for free, which separates them from the crowd.
How to get it Stand six to ten feet back and crouch slightly so the lens points up at the board. Ask your subject to hold still and actually read the screen rather than pose. Tap to focus on their shoulder or bag, not the text, so the board reads as a warm blur. Take a burst as people walk through the frame, then keep the one where the foreground is briefly clear. Late evening and early morning give you the emptiest version of this shot.
02. Walking Away Down the Terminal
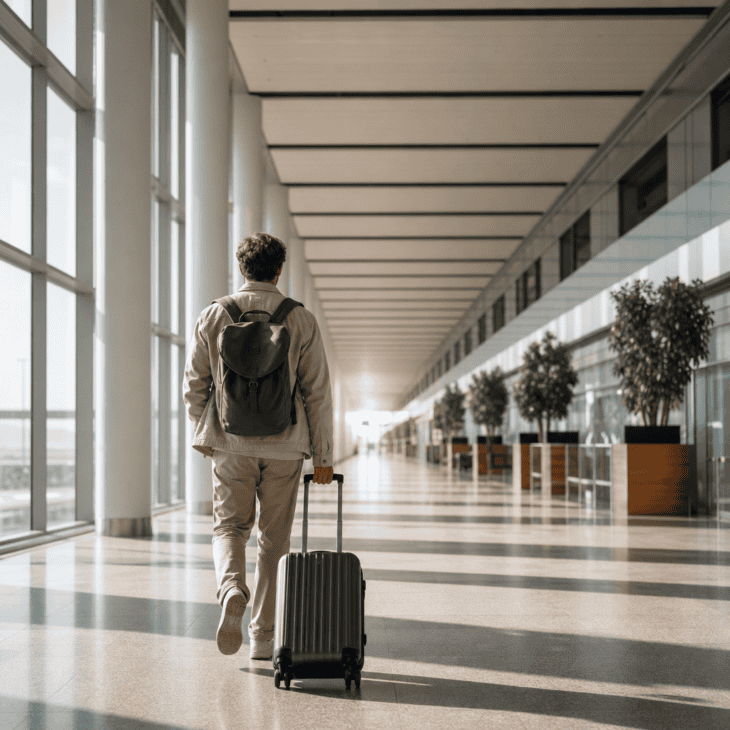
What it is A centered shot of the traveler walking straight away from the lens down a long concourse, caught mid-step with the carry-on trailing behind. The architecture does the work: floor lines, ceiling, and windows all pull toward a bright point at the far end.
Why it works A face-forward posed photo says tourist, while a walking-away shot says story. The strong perspective lines make even a plain hallway feel like the first scene of a film, and no one has to worry about their expression.
How to get it Find a stretch of concourse with a clear center and few people, often near the far gates or early in the day. Stand dead center and have your subject walk away at a normal pace while you take a burst. Keep the phone level and low, around waist height, so the ceiling stays in frame. Tell them not to look back until you say so. If it is busy, wait for a gap in foot traffic and shoot in short bursts as it opens up. This pairs well with a full stop at a long layover, when the terminal is quiet and you have time to reshoot.
03. Gate Window Silhouette
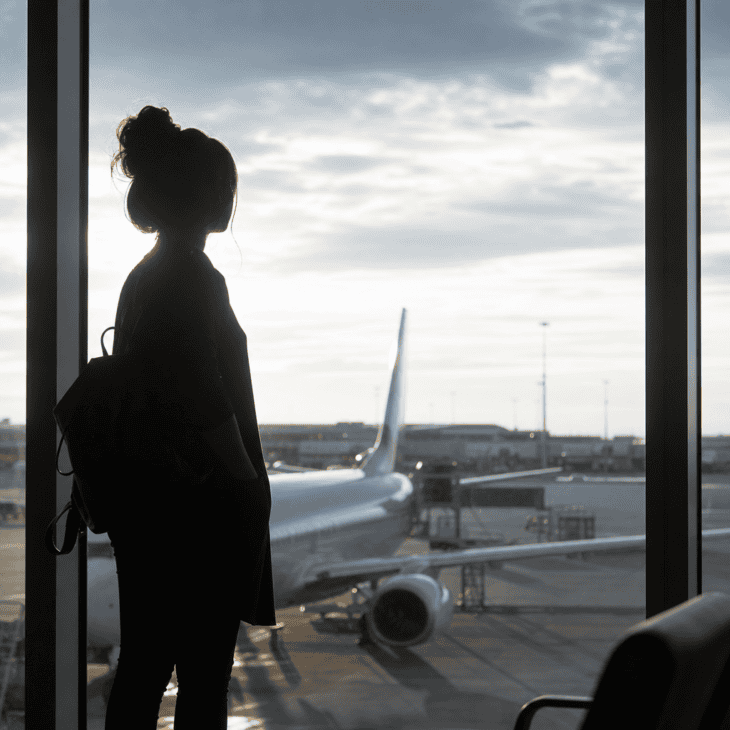
What it is A backlit frame shot from inside the terminal toward a large gate window, with the traveler as a dark shape against the sky and the outline of a plane. Detail in the subject drops away and you are left with a shape, a posture, and the light.
Why it works A silhouette hides everything that usually makes people self-conscious and keeps only the story, which is a person waiting to fly somewhere. The shape of an aircraft in the background reads instantly, even blurred.
How to get it Put your subject a few feet in front of the glass, side-on or three-quarter, with a little space between their body and the window. Tap on the brightest part of the sky so the phone darkens the whole frame, then drag the exposure slider down further if the subject is still too visible. Ask for a defined pose, a hand in a pocket or holding a coffee, since fine detail is gone and only the outline speaks. Shoot on an overcast day or when the sun is off to the side rather than blazing straight in. The same backlight trick works once you are on board for window seat photos.
04. Boarding Pass and Passport Flat Lay
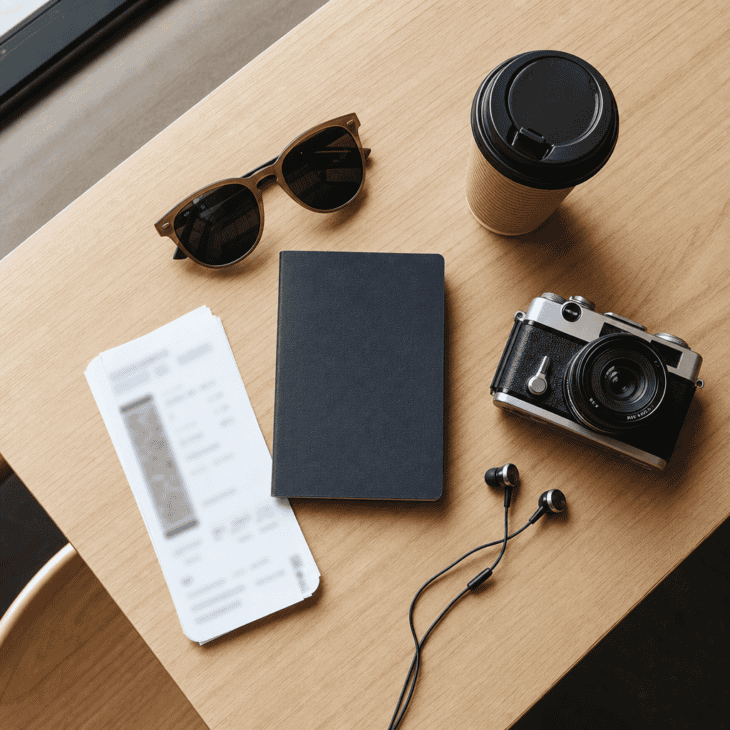
What it is A straight-down photo of your travel documents and small carry items arranged on a table, usually passport, boarding pass, sunglasses, earbuds, a camera, and a coffee. Objects are spaced out rather than piled, with one or two on a slight angle so it does not look like a police evidence photo.
Why it works It signals the trip is real and imminent without showing your face, which makes it the safest possible post before you have landed anywhere. The mix of documents and personal gear also tells people a little about how you travel.
How to get it Clear a table near a window at your gate or a terminal cafe and wipe off crumbs and rings. Lay items on a neutral surface, leave breathing room between them, and let one edge of the frame be a little empty. Stand directly above and use both hands to keep the phone level, or brace against a bag. Shoot in the shade of the window light rather than direct sun so nothing blows out. Cover or blur the barcode and name on your boarding pass before you post, since both can be scraped from a photo.
05. Sitting on the Suitcase
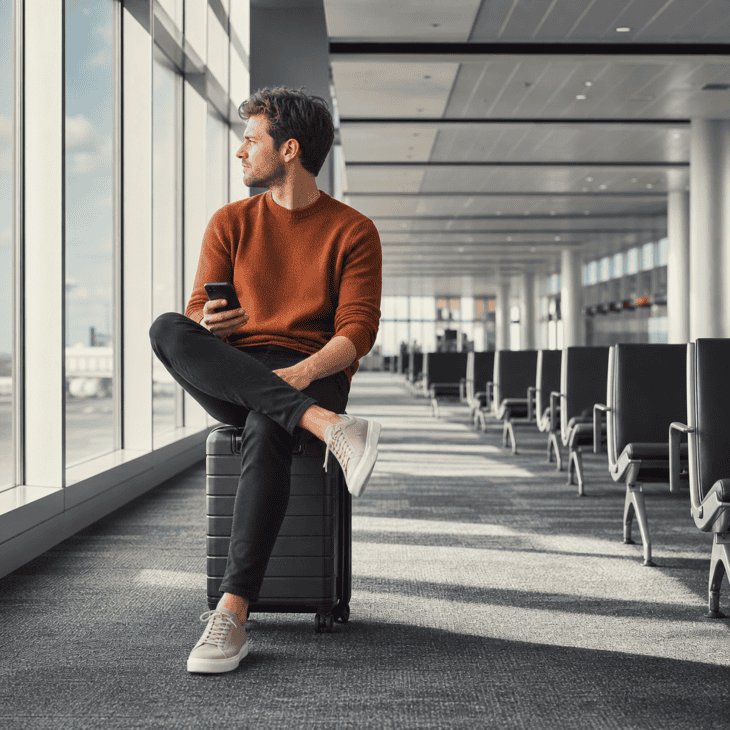
What it is A wider shot of the traveler sitting on their own suitcase rather than a chair, usually in a quiet gate area with empty seats behind them. The pose is loose: leaning on a knee, checking a phone, or looking toward the windows.
Why it works Everyone who travels has done this, so it lands as real rather than staged. The empty seats and hard light also tell the viewer this is an early or off-peak flight, which adds a small story without a caption.
How to get it Use a rigid hard-shell case that can actually take your weight, and set it upright on a flat patch of floor away from foot traffic. Sit at a slight angle to the camera rather than square on, with weight on one hip so the pose has a line to it. Shoot from a low seated height yourself so you are eye level with the subject. Include a few rows of empty chairs in the background to sell the quiet. Take one looking at the camera and one looking away, the away version usually wins.
06. Moving Walkway Motion Blur
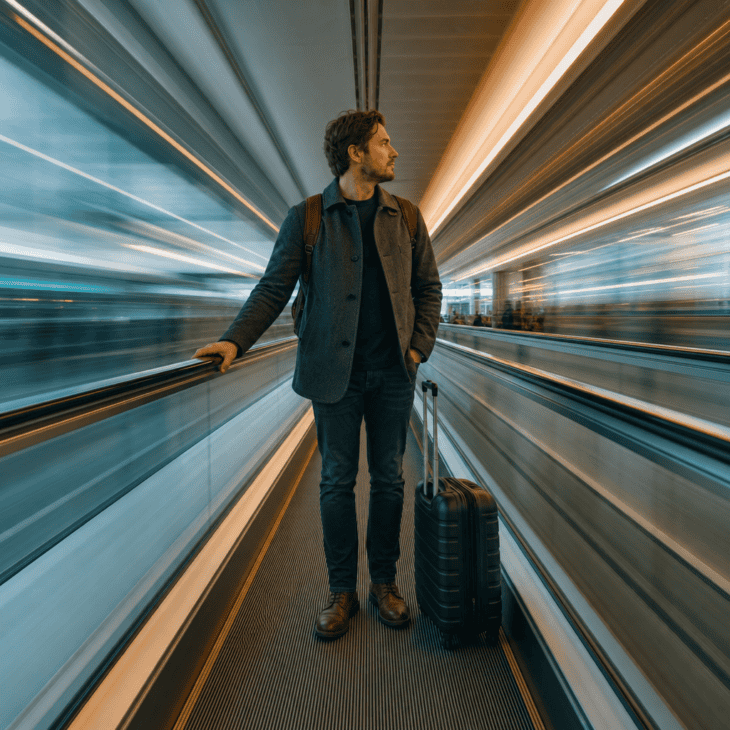
What it is A photo taken on a flat moving walkway where the traveler holds still against the handrail and the walls behind them blur into horizontal streaks. The subject stays mostly sharp while the terminal turns into lines of light.
Why it works It puts motion into a still image, which is rare for an airport photo and makes people stop scrolling. It also captures the actual feeling of being carried through a terminal you barely looked at.
How to get it Switch your camera to a slow shutter or use a phone in night mode or a slow-shutter app, aiming for roughly a quarter to half a second. Have your subject grip the rail and lock their upper body still while the walkway moves them. Brace the phone against the opposite handrail or hold it with both hands and elbows tucked in. Take many frames, since most will be too blurry and one or two will be perfect. A pop of solid color on the subject helps them separate from the streaks.
07. Golden Hour at the Gate Window
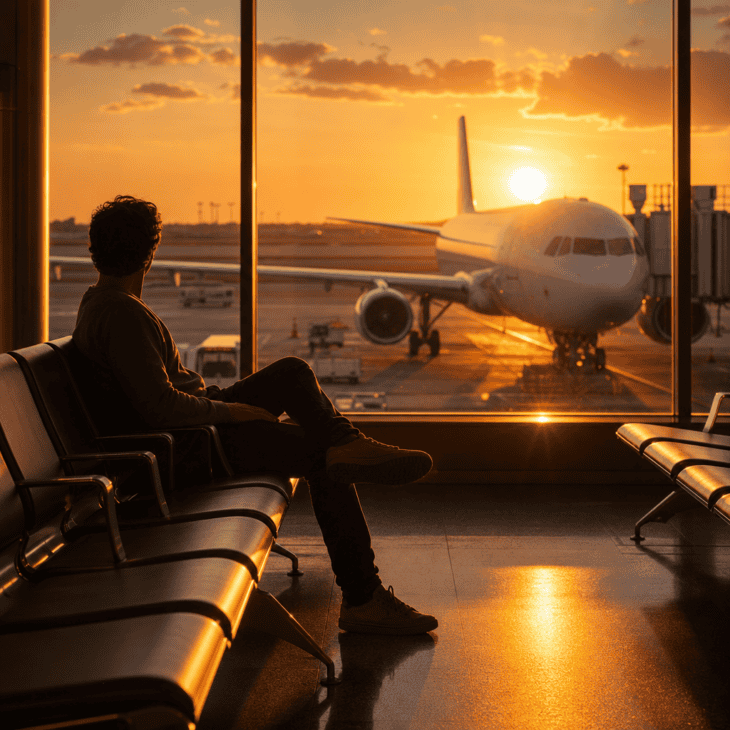
What it is A photo made in the last hour of daylight at a gate with a big window facing the sun, so warm light rakes across the floor, the seats, and the subject. It can be a portrait, a detail of a hand and a coffee, or a wide shot of the whole glowing room.
Why it works Golden hour flatters everything, and an airport gives you an unobstructed low sun that you rarely get at street level. The light itself becomes the subject, so the photo works even if nothing else is styled.
How to get it Check which direction your gate faces and time a walk over for roughly forty minutes before sunset. Position your subject so the light hits them from the side, which keeps shape in the face rather than flattening it. Tap to focus on the lit side and pull exposure down slightly so the highlights keep detail and the shadows go rich. Look for light stripes on the floor and place a foot or a bag inside one. A morning east-facing gate gives you the same effect at the other end of the day, useful before a red-eye flight lands you somewhere at dawn.
08. Coffee Cup With Plane in the Background
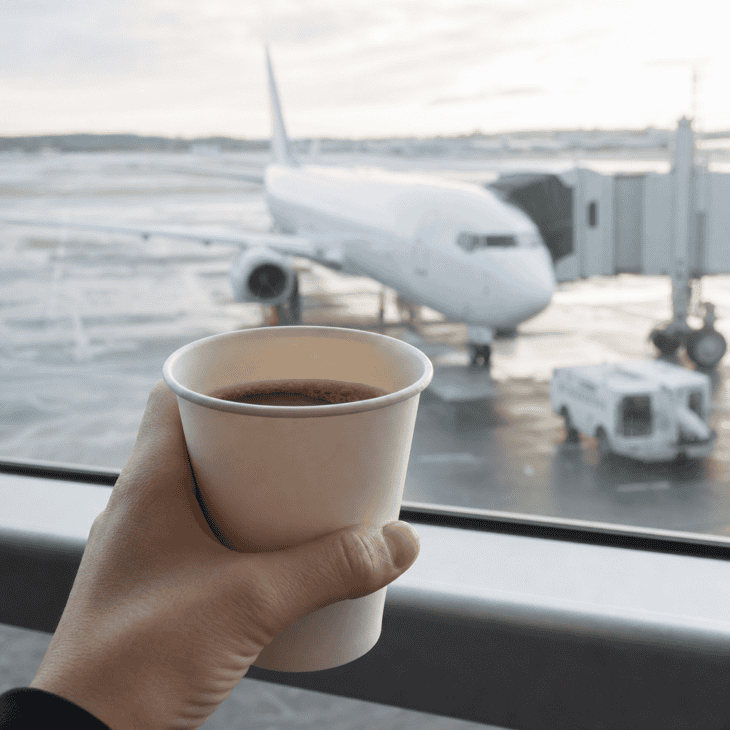
What it is A first-person shot of your own hand holding a coffee cup up near the gate window, with a plane sitting out on the ramp behind it. The cup is sharp and close, the aircraft is a soft shape that tells you where you are.
Why it works It is the pre-flight ritual in one frame, and the point of view puts the viewer in your seat instead of looking at you. The blurred plane adds place and scale without competing with the cup.
How to get it Grab a window seat at the gate with a clear view of a parked aircraft and good light. Hold the cup out at arm’s length, roughly level with your eyes, close enough that the phone focuses on it. Tap the cup to lock focus so the background goes soft, and use portrait mode if the blur is not strong enough. Keep your hand relaxed, not gripping, and let a little steam show if the drink is hot. Frame so the plane sits in the open space beside the cup rather than directly behind your hand.
09. The Staircase or Escalator Descent
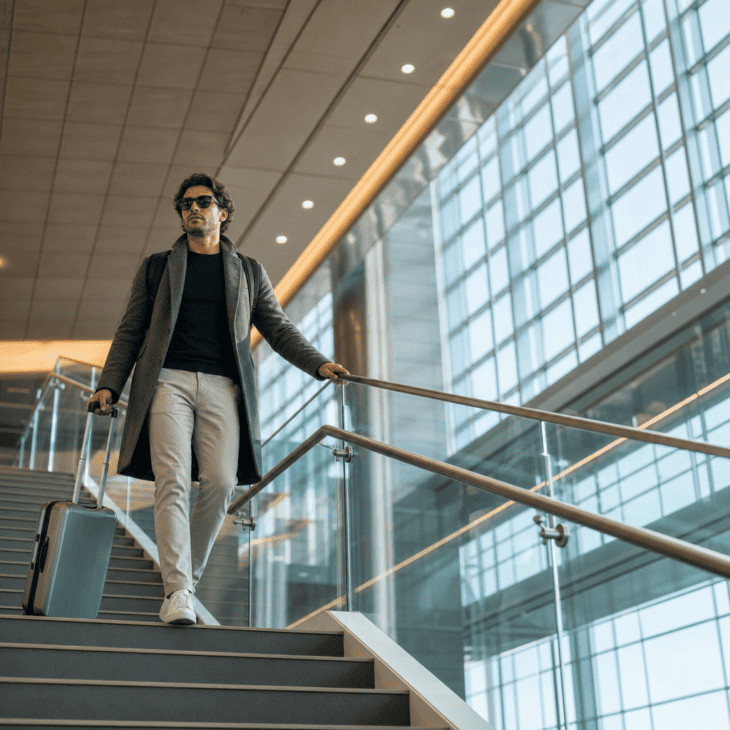
What it is A shot taken from the bottom of an open staircase or beside an escalator, looking up as the traveler comes down. The steps, railings, and atrium glass create strong diagonals that box the subject in without any effort.
Why it works Big airport stairwells are built like film sets, with height, glass, and light that most buildings do not have. Photographing up at someone gives them presence, so a plain descent looks like an entrance.
How to get it Stand at the foot of the stairs, off to one side so you are not blocking anyone, and tilt the phone up. Have your subject walk down at a steady pace with a hand lightly on the rail and eyes ahead, not down at their feet. Use the leading lines of the steps and railing to point toward them. Shoot a burst across several steps and keep the frame where their body sits in an open pocket of the composition. Empty stairwells are easiest right after a boarding rush clears the level.
10. Terminal Window Reflection
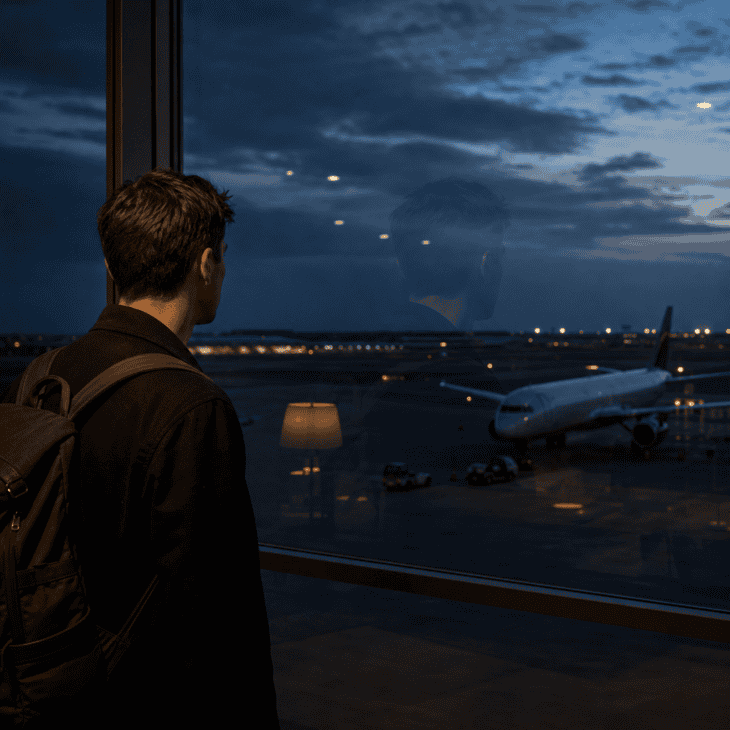
What it is A photo that uses the terminal glass as a soft mirror, catching a faint reflection of the traveler laid over the tarmac view outside. You get two images in one: the person inside and the world they are about to fly into.
Why it works The doubled image feels dreamy and a little cinematic, which suits the in-between mood of waiting to leave. It also hides detail, so it flatters the subject and keeps the focus on atmosphere.
How to get it Shoot when the light outside is roughly equal to or dimmer than the light inside, usually the half hour around sunset or a gray day. Stand a step to the side of your subject and shoot along the glass at a shallow angle so the reflection stacks over the view. Tap between the reflection and the outside to see which focus point looks best, then lock it. Cup a hand around the lens to block glare from ceiling lights. Move a few inches at a time, since the reflection shifts fast with the angle.
11. Skylight and Ceiling Architecture
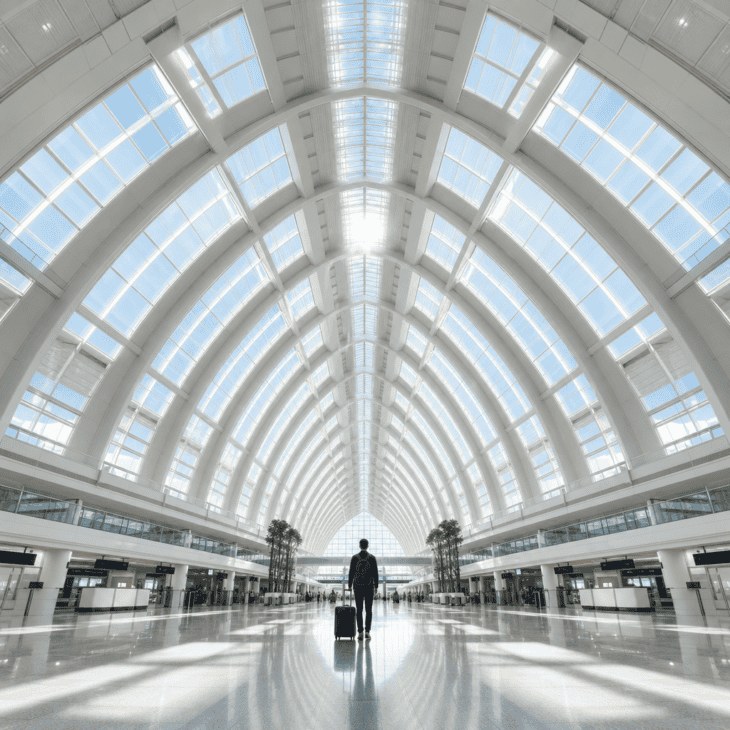
What it is A wide, mostly upward shot of the terminal roof, its ribs, beams, and skylights, with the traveler placed small and central on the floor far below. The building is the subject and the person is the scale.
Why it works Modern terminals are some of the most photographed architecture in the world for a reason, and a tiny figure under a huge roof creates instant awe. It is also a face-free photo, which is handy for a solo traveler.
How to get it Find a spot where the roof structure is symmetrical, often the center of a check-in hall or a main concourse crossing. Have your subject stand on a marked line or a floor pattern center and hold still. Back up, get the phone low, and tilt up until the ceiling fills most of the frame with the person near the bottom edge. Turn on gridlines and level the shot so the symmetry reads. Midday gives the brightest skylights; an empty early hour keeps stray people out of the wide frame.
12. Couple Holding Hands Toward the Gate
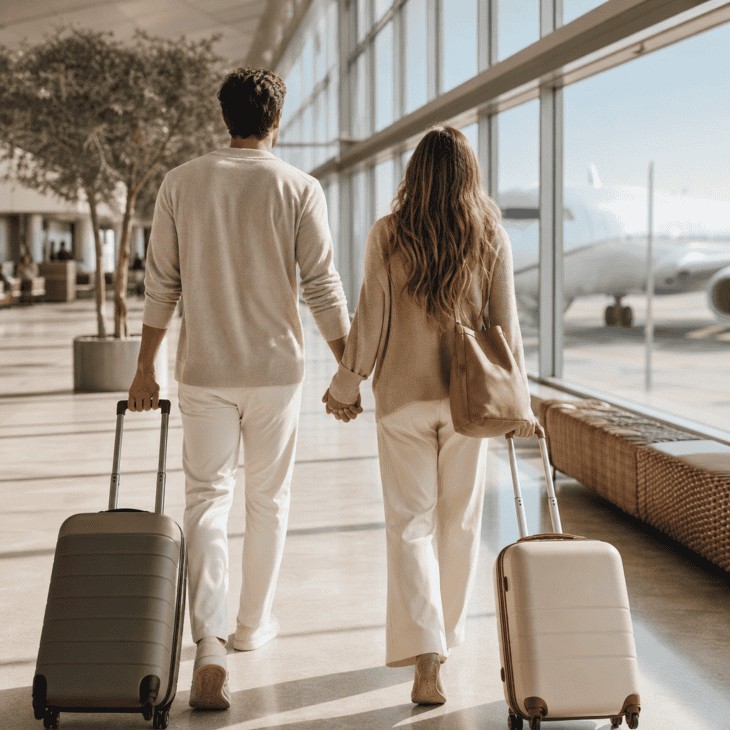
What it is A from-behind shot of two people walking hand in hand toward their gate, each rolling a bag with the other hand. The link between them and the direction of travel carry the whole frame.
Why it works It reads as the start of a trip you are taking together, which is warmer than a posed couple selfie. Shooting from behind also means no one has to nail an expression, and it stays flattering in any light.
How to get it Hand the phone to a third person, or prop it on a bag with a timer and burst mode. Have the couple start a few steps back and walk away at a relaxed pace, hands joined, looking ahead. Keep the phone centered and low for that long-corridor perspective. Coordinating outfit tones, even loosely, makes the pair read as a unit. Take a version where one person glances at the other mid-stride, which often becomes the keeper.
13. Jet Bridge Window Peek
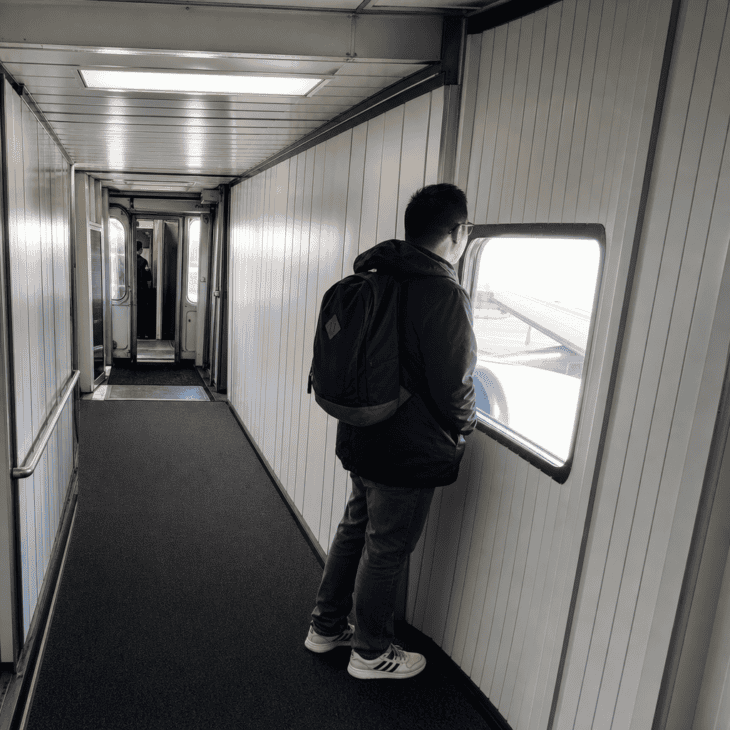
What it is A photo taken inside the jet bridge, the enclosed ramp between the gate and the aircraft door, usually of a traveler stopping at one of the small side windows to look at the plane. The tunnel shape and the sliver of daylight do the composing.
Why it works Almost no one photographs this stretch, so it feels like a behind-the-scenes moment rather than a standard travel shot. It is the last threshold before the flight, which gives it a quiet tension.
How to get it Move quickly and stay to one side so you do not hold up the line behind you. Shoot down the length of the bridge with the angled walls framing your subject at a window. Tap on the traveler, not the bright window, then lift exposure a touch so they do not go fully dark. A single grab shot is usually all you get, so take a short burst as you walk. If the bridge is glass-sided, you may also get a clean shot of the aircraft nose from the connector.
14. Rolling Carry-On, Low Angle
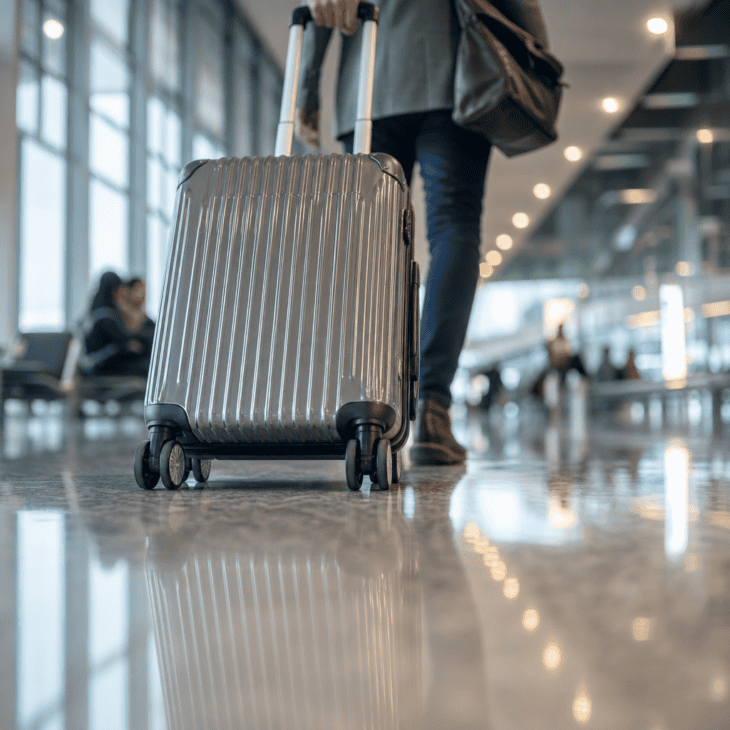
What it is A shot taken with the phone almost on the floor, looking along the polished terminal surface as a suitcase rolls toward or past the lens. The bag is sharp and large in front, the person is a soft shape above it, and the floor reflects the ceiling lights.
Why it works The unusual angle turns an everyday object into the main character and gives a strong sense of movement. Glossy airport floors act like a mirror, doubling the light and adding depth for free.
How to get it Set the phone directly on the floor or hold it an inch above, lens pointing down the concourse. Have your subject walk the bag past you from a few feet away while you fire a burst. Focus on the wheels or the lower corner of the case so the bag stays crisp. Look for a stretch of clean, reflective floor without scuff marks or wet-floor signs. A bright pop of color on the bag or the shoes makes the reflection pop.
15. The Baggage Carousel Wait
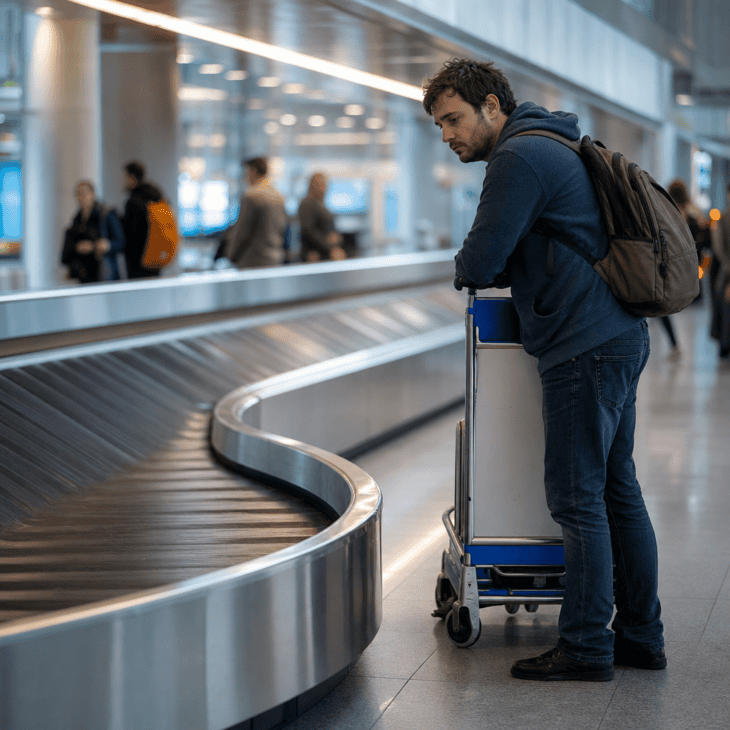
What it is An arrivals-side photo of the traveler standing at the baggage carousel, with the curved belt sweeping through the frame. It is the mirror image of a departure shot: same person, other end of the trip, tired instead of excited.
Why it works Arrival photos are rare because everyone is done shooting by then, so this stands out in a set. The curve of the carousel is a strong built-in leading line straight to the subject.
How to get it Stand back from the belt and use its curve to lead the eye toward your subject, who can lean on a cart or check the arrivals board on a phone. Shoot before the bags start moving so the belt is clean, or wait for motion blur once it runs. Keep other people soft in the background rather than sharp. A slightly lower angle makes the carousel loop feel bigger. This is the shot that proves you actually made it somewhere.
16. Observation Deck Runway View
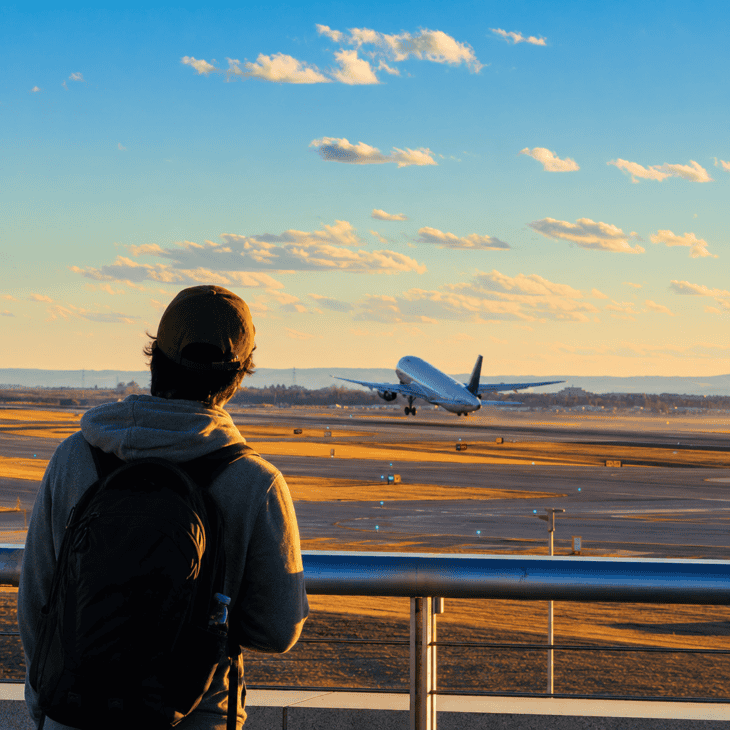
What it is A photo from an airport observation deck or public viewing area, framing the traveler at the railing with a runway and moving aircraft behind them. Many large airports have one, sometimes free, sometimes for a small fee.
Why it works You get real sky, real scale, and an actual plane in motion, which a gate window rarely delivers. It also turns dead time before a flight into something worth doing, not just waiting through.
How to get it Check your airport’s website for a viewing deck and its opening hours before you go, and allow extra time past security if it is landside. Put your subject at the rail, off center, and leave room on the other side for a plane to sit in the frame. Watch the pattern of takeoffs and time your burst as an aircraft rotates. Late afternoon light is kindest and the haze is often lower. A longer lens or phone zoom pulls a distant jet closer without cropping quality away. For more on this, see our plane spotting tips.
17. Nighttime Tarmac Lights Through the Glass
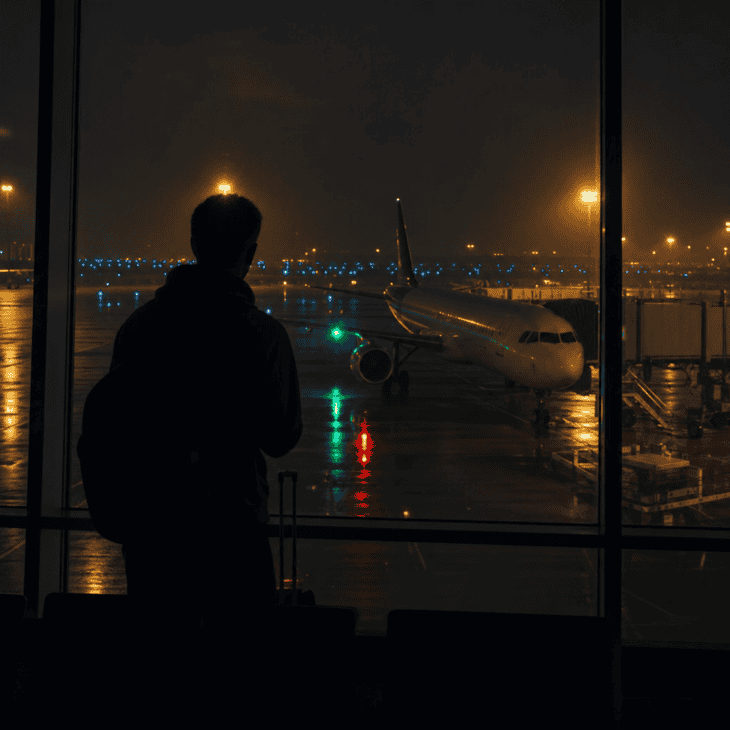
What it is A low-light photo at a gate window after dark, with the traveler as a silhouette and the ramp outside lit by blue taxiway lights, amber floods, and the colored nav lights of parked aircraft. Wet pavement doubles all of it in reflection.
Why it works Night airports look like nothing else, all pools of colored light in the black. The silhouette keeps the subject simple and lets the lights carry the mood, which suits a late or overnight departure.
How to get it Turn off the flash and use night mode, then brace the phone against the window frame or a rail to hold it steady for the long exposure. Cup a hand around the lens to kill reflections of the terminal lights behind you. Expose for the outdoor lights so the subject falls to a clean black shape. Look for a moment right after rain when the tarmac is glossy. A parked aircraft with its beacon on adds a rhythmic red pulse across a burst of frames.
18. The Adventure Awaits Window Gaze
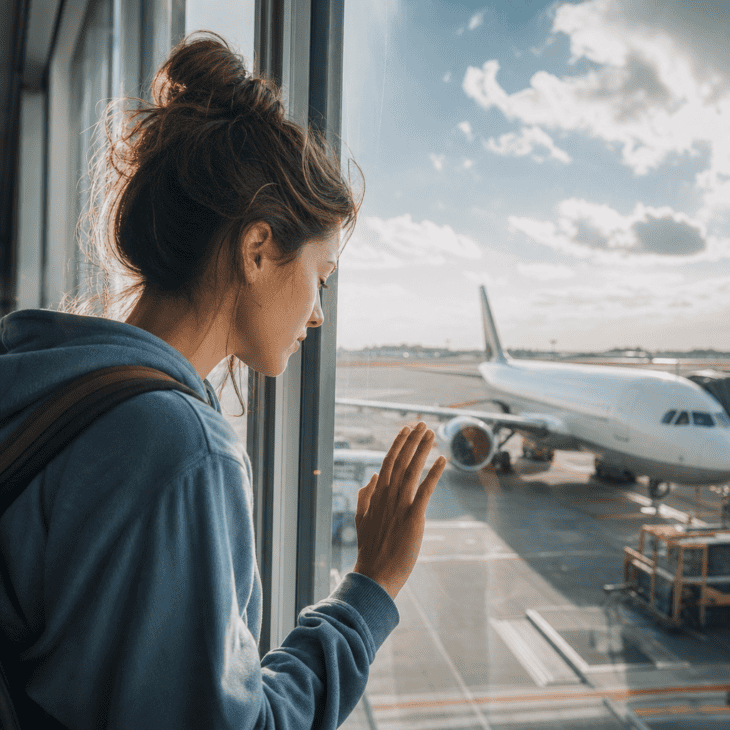
What it is A quiet three-quarter shot of the traveler standing close to the gate glass, looking out at the aircraft and sky, sometimes with a hand on the window. It is a mood photo more than an action one.
Why it works It captures the specific feeling of a trip that has not started yet, which is hard to fake later. The window light is soft and directional, so it flatters the face without any setup.
How to get it Have your subject actually watch something outside, a plane pushing back or a tug crossing the ramp, so the gaze has a reason. Shoot from the side at a slight angle so you get the face in profile and the view together. Meter for the skin, which will brighten the window behind and can look nicely dreamy. Ask them not to smile at the camera; the point is that they forgot it was there. Keep your own reflection out of the glass by standing to the shadowed side.
19. Full-Length Travel Outfit Shot
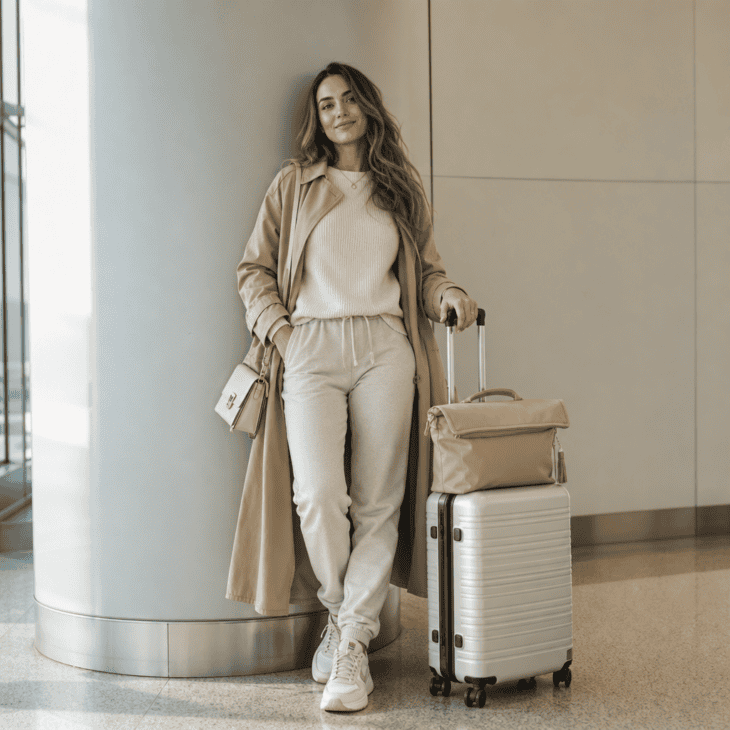
What it is A head-to-toe photo of the traveler and their outfit, shot against a clean stretch of wall, a plain column, or a simple bank of chairs. The clothes and the luggage are the subject, so the background stays quiet.
Why it works Travel-outfit photos are one of the most saved kinds of airport content, because people are always planning what to wear on a flight. A tidy terminal backdrop makes the outfit read clearly.
How to get it Scout a plain wall away from busy signage and bins, ideally lit by soft window light rather than hard ceiling spots. Shoot from about chest height and keep the phone vertical and level so legs are not distorted or cut off. Ask for a relaxed contrapposto stance, weight on one leg, one hand on the bag. Take a few frames: looking away, mid-walk, adjusting the strap. If you want the outfit details sharp, step in for a second half-body frame. Pair the post with our guide to airport outfit ideas.
20. Empty Early-Morning Terminal
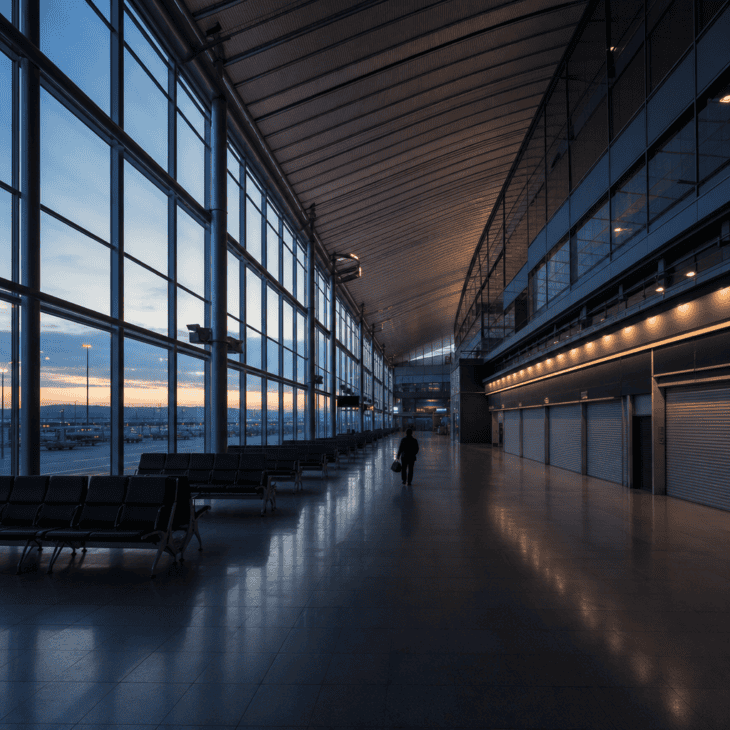
What it is A wide, mostly empty photo of the concourse before the airport fully wakes up, with closed shops, unlit signs, and a single small figure walking through. It is the opposite of the usual crowded travel shot.
Why it works An empty airport looks strange and a little cinematic, because we almost never see one. The stillness and cool dawn light give the frame a calm that a busy midday concourse cannot.
How to get it This is a photo you only get with a very early flight, so shoot it on the way to a dawn or first-wave departure. Find a long clean sightline down the concourse and place your subject small in the middle distance. Keep the phone level and let the empty seats and dark shopfronts fill the sides. Brace against a rail in the low light and avoid zooming, which adds noise. Even one or two other travelers are fine; they add scale without breaking the quiet. It also earns a spot on an aviation bucket list if you have never seen a terminal this still.
21. Passport Stamp and Ticket Stub Close-Up
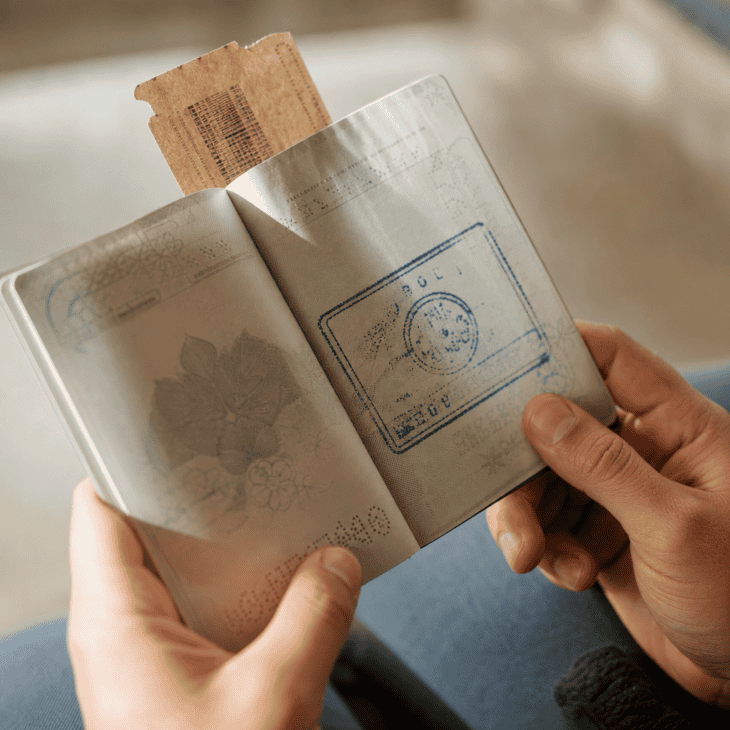
What it is A close detail photo of an open passport with a fresh entry stamp, often with a torn boarding pass stub tucked into the page. It is an arrivals photo, taken once you are through immigration.
Why it works The stamp is a tiny, physical marker of a border crossed, and it dates the trip without a caption. Shot tight enough, it is personal without exposing any of your actual details.
How to get it Step aside somewhere with good light after clearing immigration, not in the queue. Hold the passport open with both hands or rest it on a bag and shoot straight down. Focus on the stamp and let the rest of the page fall soft. Frame in so that your name, number, and photo page are all out of shot, and check the final image before posting. Soft daylight from a window gives the paper a nice warmth; avoid harsh overhead light that flattens the ink.
22. The Airport Lounge Relax Shot
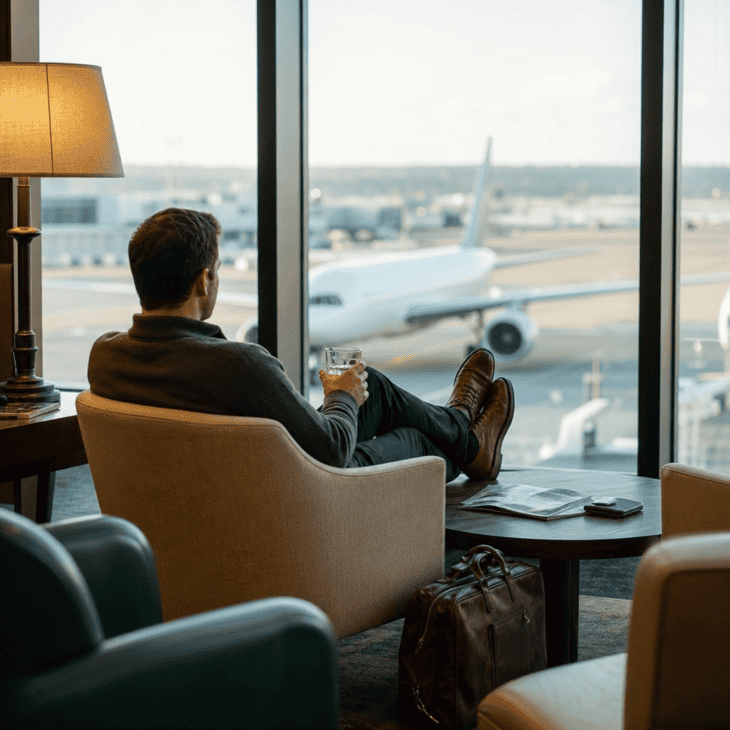
What it is A relaxed photo taken in an airport lounge, with the traveler sunk into a good chair, a drink to hand, and a window view of the ramp behind. It trades the hard gate bench for something softer.
Why it works The contrast between the calm interior and the busy airfield outside makes the frame feel like a small luxury. Lounges also tend to have better light and less clutter than the public gates.
How to get it Pick a seat near the windows with a plane in view and a lamp or soft light nearby. Shoot from a low, seated angle so the chair frames the subject and the window sits behind their shoulder. Meter for the interior and let the ramp go a little bright and soft. Keep other guests out of frame out of courtesy, and do not photograph staff or the reception desk. A book, a glass, and crossed ankles are enough styling. Shoot it early, before the lounge fills up for the evening rush.
23. Family Walking the Concourse
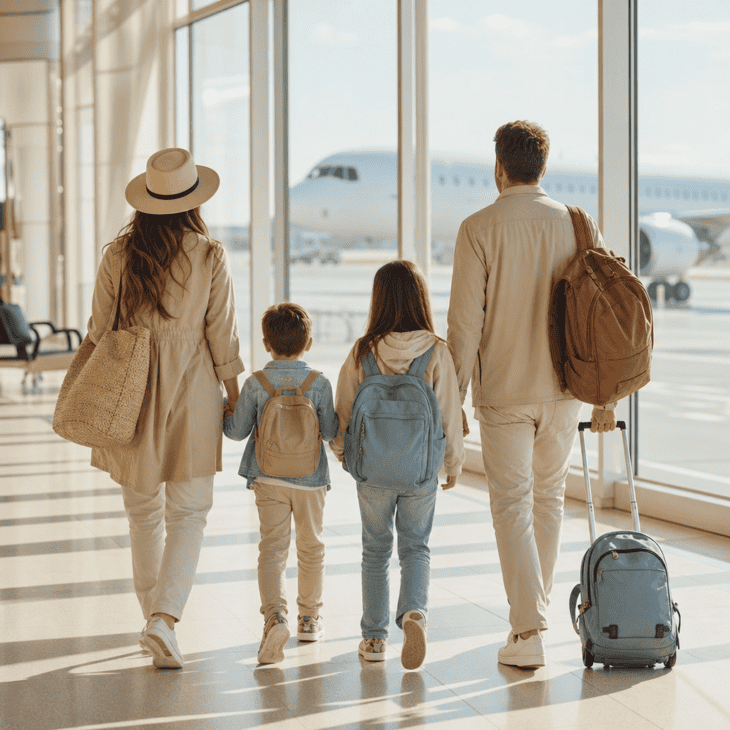
What it is A from-behind shot of the whole family walking down the concourse together, kids included, often with a child towing a small wheeled bag. The group and the shared direction of travel carry the frame.
Why it works Getting a whole family to look good facing a camera is nearly impossible, and shooting from behind removes that problem entirely. It also captures the actual chaos-into-adventure feeling of traveling with children.
How to get it Ask another adult to hang back with the phone, or set it on a bag with a timer. Have everyone start together and walk at the kids’ pace toward the gate. Shoot low and centered for the corridor perspective, and take a long burst since someone is always mid-blink or mid-turn. Loosely matching colors help the group read as one. Let the kids be kids; a child looking sideways or lagging a step usually makes the photo better, not worse.
24. The Group Jump at Arrivals
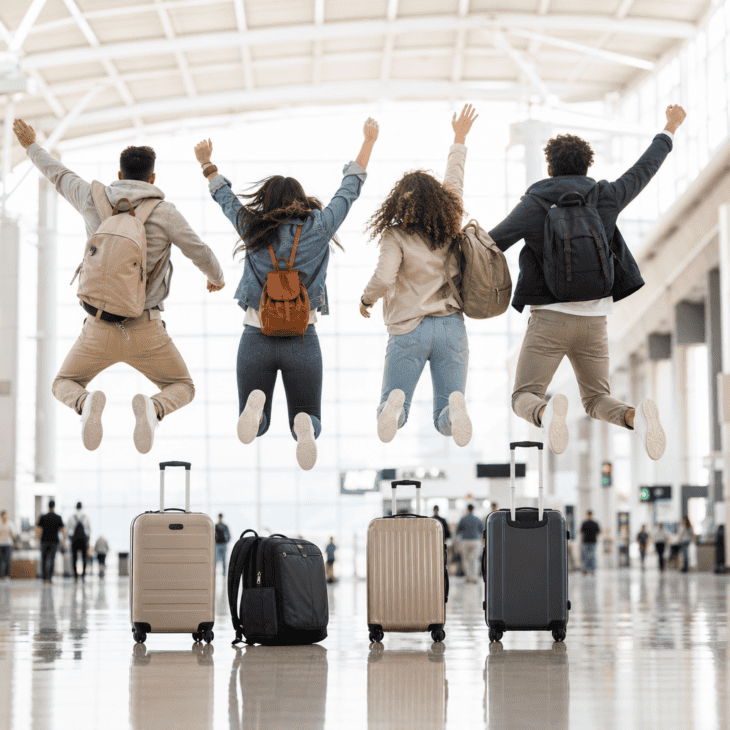
What it is The classic group jump shot, done in the wide open space of an arrivals or check-in hall, with bags dropped in a pile and everyone in the air at once. It is loud, corny, and it works.
Why it works After a long travel day, a jump is the honest reaction, and the energy reads instantly. Airport halls have the ceiling height and clean background that most indoor spaces lack, so the jump has room to breathe.
How to get it Find a clear patch of floor well out of the way of foot traffic and trolleys. Put the phone on burst and count the group in so everyone leaves the ground on the same beat. Shoot from slightly low so the jump looks higher, and leave headroom above the tallest person. Expect to run it four or five times before every person is airborne and roughly in focus. Keep it quick and tidy up your bags fast so you are not blocking the hall.
25. The Terminal Shop and Duty-Free Wander
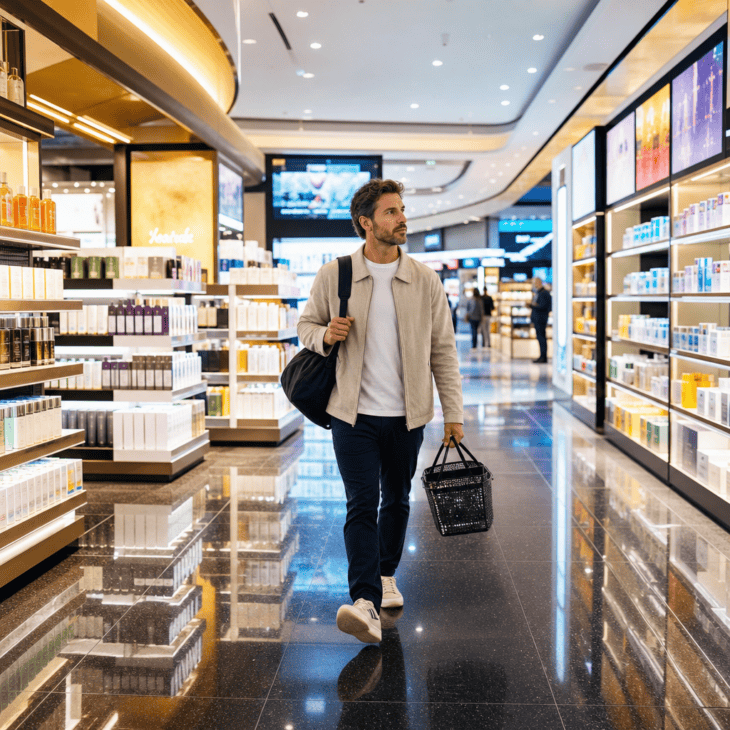
What it is A candid-style photo of the traveler wandering a terminal shop or duty-free hall, basket in hand, walking an aisle lined with bright shelves and backlit color walls. It is a movement-and-color shot, not a posed one.
Why it works Duty-free lighting is punchy and saturated, which gives an otherwise ordinary photo a lot of pop. The killing-time-before-boarding browse is a universal travel experience, so it lands as relatable.
How to get it Walk a step or two behind your subject and shoot down the aisle as they browse, so the shelves become leading lines. Have them actually pick something up and look at it rather than freeze. Use a faster shutter or burst mode since you are both moving. Point the frame toward a backlit color wall for the richest background. Be discreet, keep other shoppers and staff out of frame, and do not photograph checkout areas or specific brand displays.
Safety tip
Before you post any airport photo, blur or crop out your boarding pass barcode, full name, and passport details. All three can be read from a clear image and used to access your booking.
Sources and references used for research and fact-checking.
- Federal Trade Commission, Why you should never post your boarding pass online
- Transportation Security Administration, Photography and filming at airports: passenger guidance
- Airports Council International, Airport observation decks and public viewing areas
- Adobe, Understanding golden hour and window light for photography
Get the Newsletter
The latest aviation news and stories sent to your inbox.
About the Author

Hanna writes AeroCorner's aviation-lifestyle and decor guides, turning a love of flight into ideas for your home, celebrations, and gift lists.