

Table of Contents
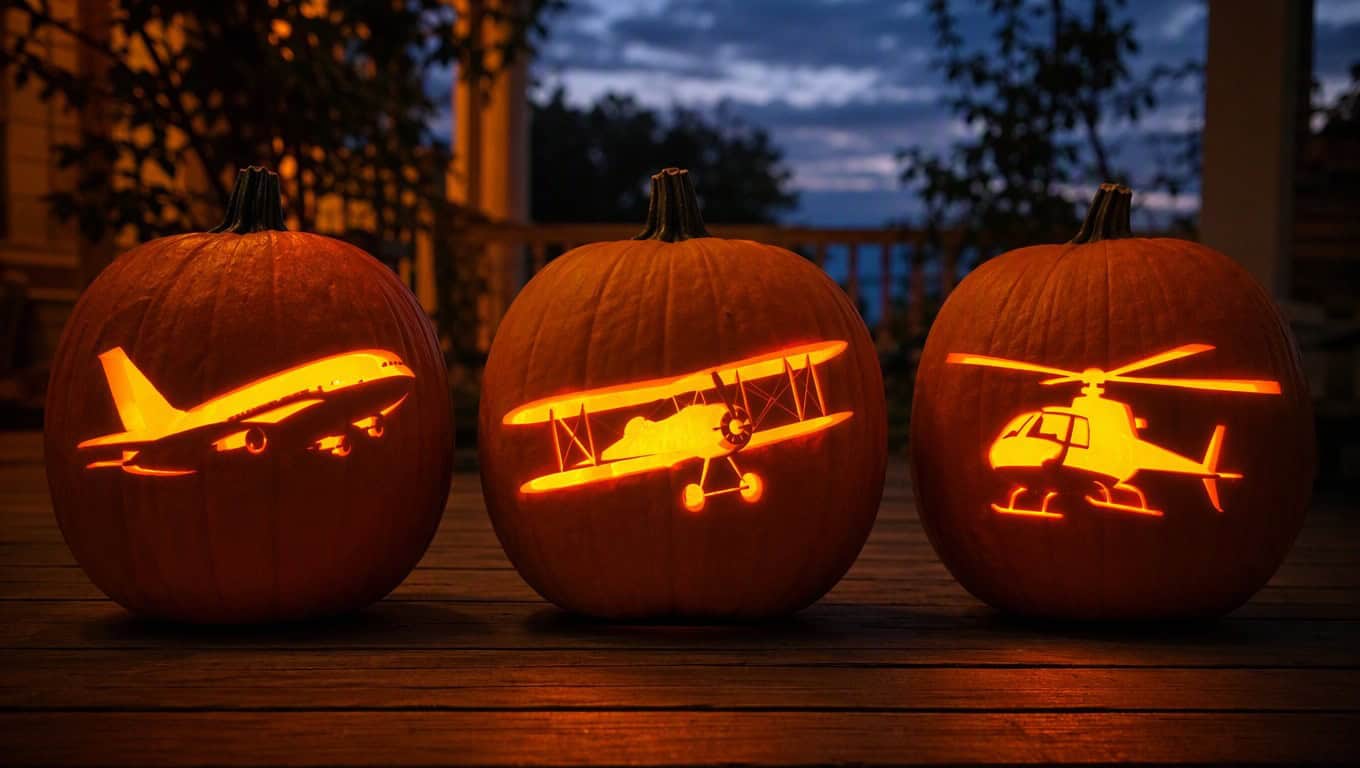
An airplane is one of the best shapes to put on a pumpkin. Wings, tails, and propellers cut cleanly, and the silhouette reads from the sidewalk once a light goes on inside.
The designs below cover every skill level, from a single-layer airliner stencil to etched wings and painted no-carve jets. Most need only a printed outline, a pumpkin saw, and a free evening.
Pick one that fits your pumpkin’s shape and your patience. Carve the smallest cutouts first, keep thin parts attached to the skin, and use a battery light instead of a flame so the glow lasts through the night.
01. Classic Airliner Silhouette
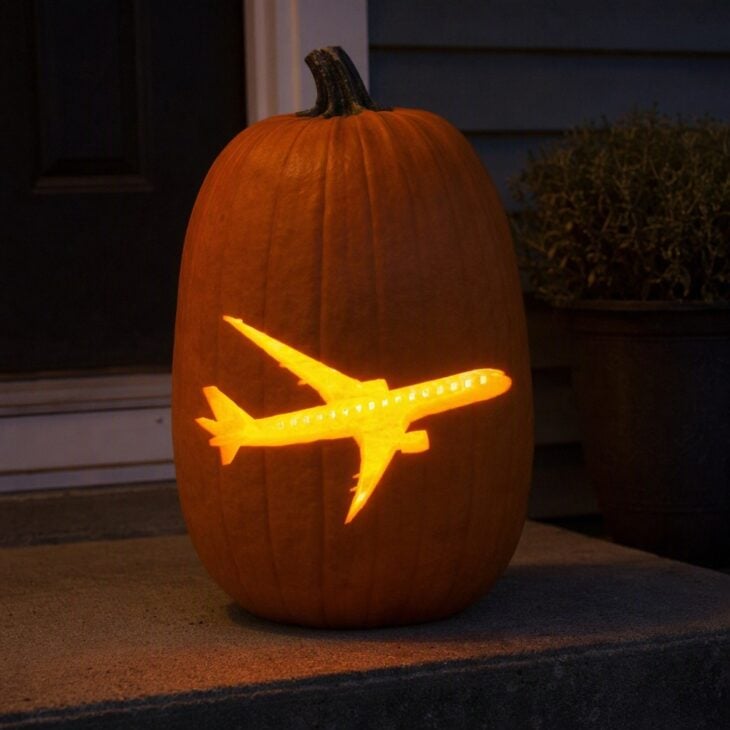
What it is A side-profile airliner cut through the front of a tall pumpkin, with a swept tail fin, a row of oval windows, and two engine pods under the wings. Cut it as a single-layer stencil so the glow shows the full outline.
Why it works The shape of a wide-body jet is recognizable from its outline alone, which makes it the safest first pick for a beginner carver.
How to get it Print a side-view airliner outline at about 10 inches long and tape it to a wide, flat-faced pumpkin. Poke through the lines with a pin tool, then cut the smallest pieces first, the windows and engine pods, before the wings. Keep the fuselage connected to the pumpkin skin at the nose and tail so the cutout does not collapse.
02. Propeller Biplane Stencil
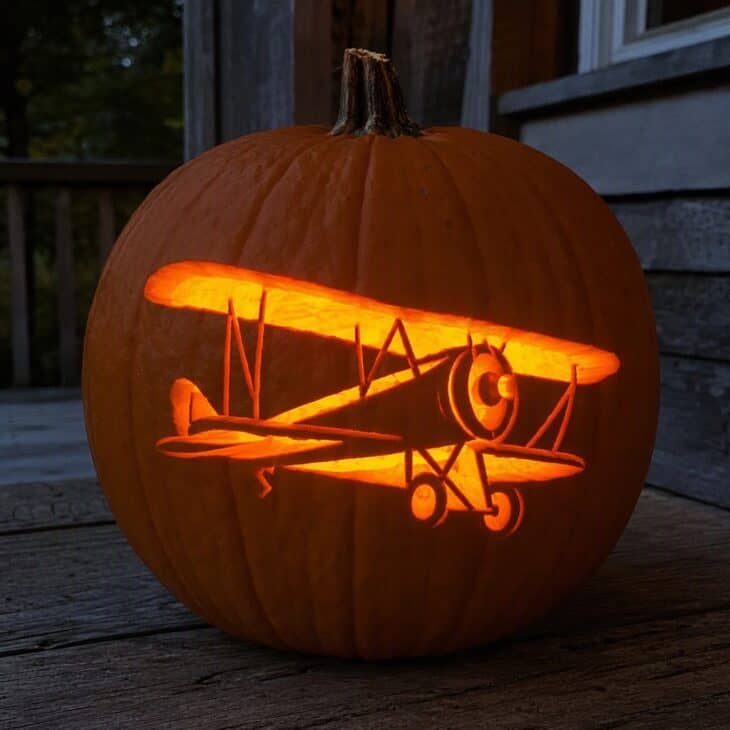
What it is A two-wing biplane with a round engine cowling, a spinning propeller disc, struts between the wings, and a trailing scarf, cut as a stencil in a medium pumpkin.
Why it works The struts and double wings give a vintage look that reads clearly even with a few bright lines.
How to get it Choose a simple biplane clip-art outline with thick struts, since thin wires will not survive a carving knife. Enlarge it to fill the pumpkin face, then carve the interior shapes before the outer edge. Rub a little petroleum jelly on the cut edges to slow drying. Pair it with other vintage aviation decor on the porch for a matching look.
03. Fighter Jet in a Dive
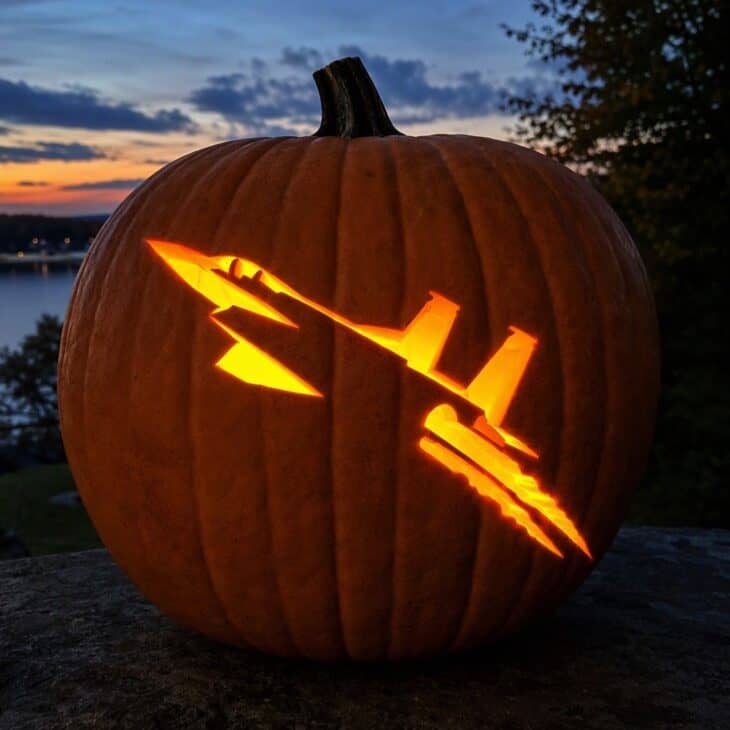
What it is A delta-wing fighter in a steep banking dive, drawn with a pointed nose, twin tail fins, and a short exhaust trail. The angled pose fills a round pumpkin better than a level side view.
Why it works A diagonal composition fills the circular canvas and looks more dynamic than a flat profile.
How to get it Pick a generic jet outline rather than a specific model, and tilt the stencil about 30 degrees on the pumpkin. Carve the exhaust trail as a few thin tapered lines that stay attached at one end. Use a small drywall saw or a pumpkin saw for the long straight wing edges, which a kitchen knife wobbles on.
04. Hot Air Balloon Pumpkin
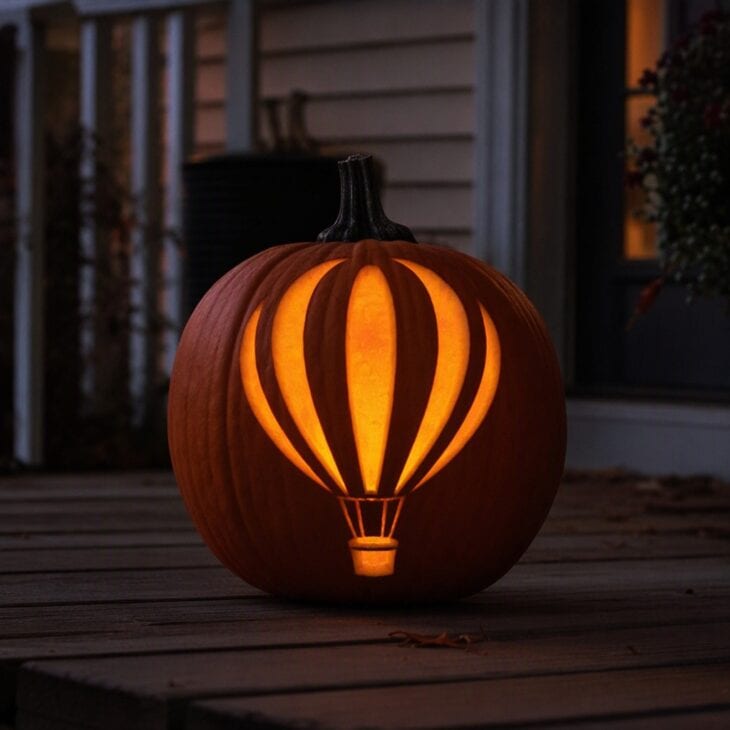
What it is A carved balloon envelope with curved panel lines and a small basket hanging below, using the pumpkin’s natural round shape as the balloon itself.
Why it works A pumpkin already looks like a balloon, so the carving only has to add the panel stripes and the basket.
How to get it Carve long curved vertical stripes from the top stem down to the base, leaving every other stripe uncut. Cut a tiny basket from a separate small pumpkin or a carved square on the bottom third. Keep the stripes about an inch wide so they stay structural.
05. Paper Airplane Trail
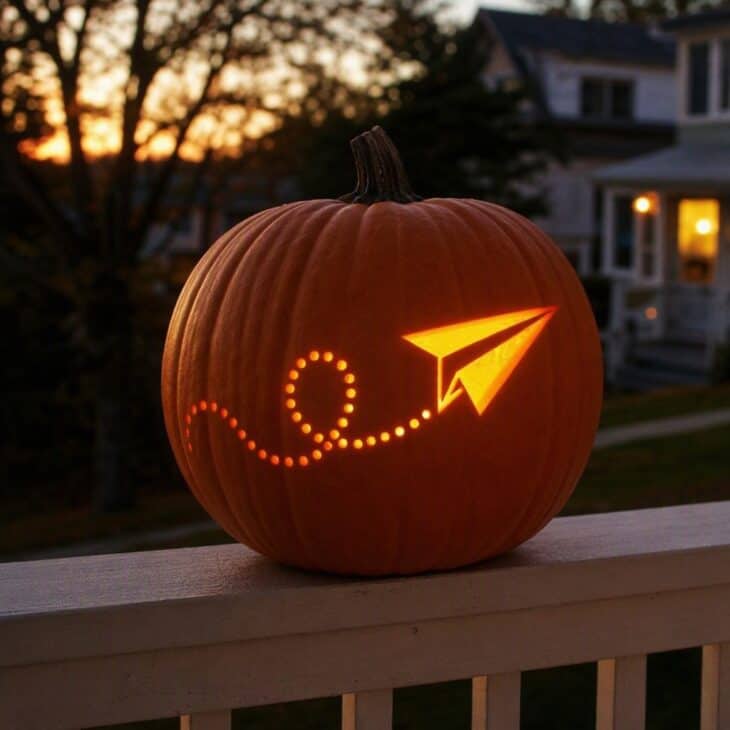
What it is A folded paper plane cut as a simple triangle shape, followed by a dotted looping trail made of small round holes drilled across the pumpkin.
Why it works The dotted trail uses a drill, which makes it quick, and the plane itself is only a few straight cuts.
How to get it Cut the paper plane as a single pointed shape on one side of the pumpkin. Use a power drill with a half-inch bit for the dotted loop, spacing holes about an inch apart. Drilled holes are easier than knife work, so this suits younger helpers, with an adult handling the drill.
06. Helicopter Rotor Silhouette
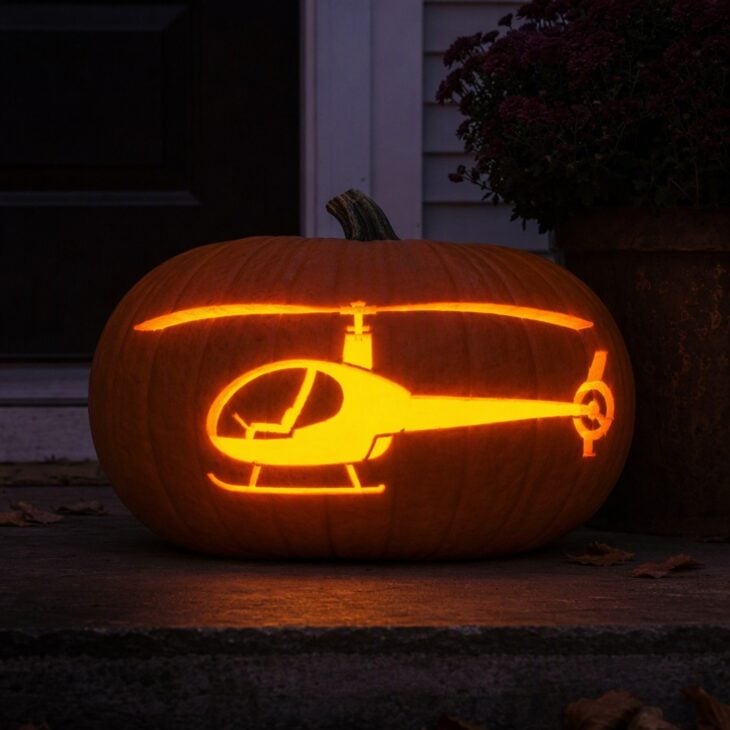
What it is A side-view helicopter with a bubble cockpit, a thin tail boom, a tail rotor, and a blurred main rotor blade across the top.
Why it works The tail boom and rotor make an unmistakable shape that stays readable at a distance.
How to get it Choose a wide pumpkin so the rotor has room to span the width. Carve the main rotor as a thin tapered line, leaving small bridges every two inches so it holds. Support the tail boom by keeping it thicker than looks right on paper, because it is the first part to snap.
07. Painted No-Carve Airliner
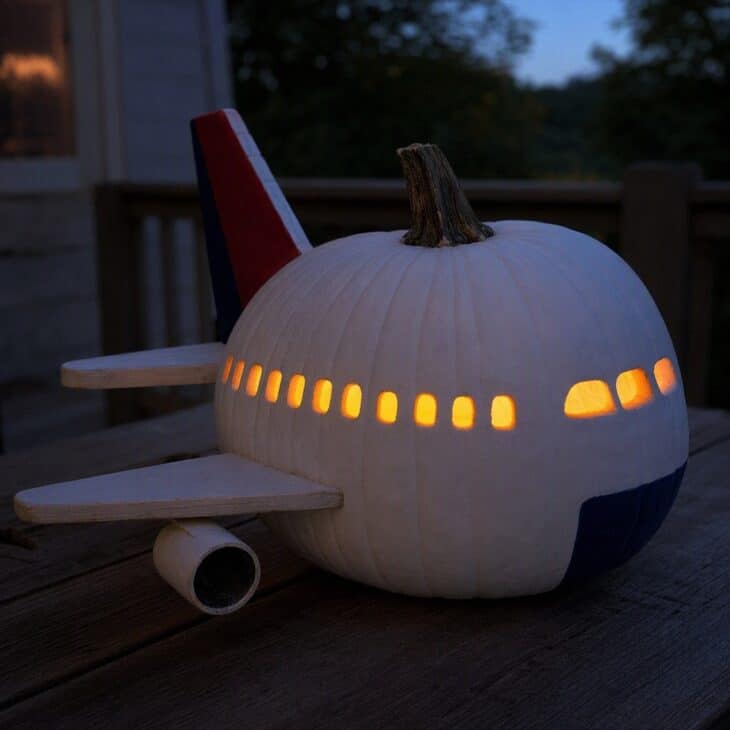
What it is A smooth pumpkin painted with acrylic paint in a white fuselage, a colored tail, and a row of black windows, with no cutting at all.
Why it works Painting keeps the pumpkin fresh longer than carving does and lets small children join in without knives.
How to get it Wipe the pumpkin dry, then paint a base coat of white acrylic across the middle band. Add a row of small black dots for windows and a colored tail shape on one side, using an invented color scheme rather than a real airline’s. Seal with a clear matte spray once the paint is dry.
08. Pilot Wings Badge Pumpkin
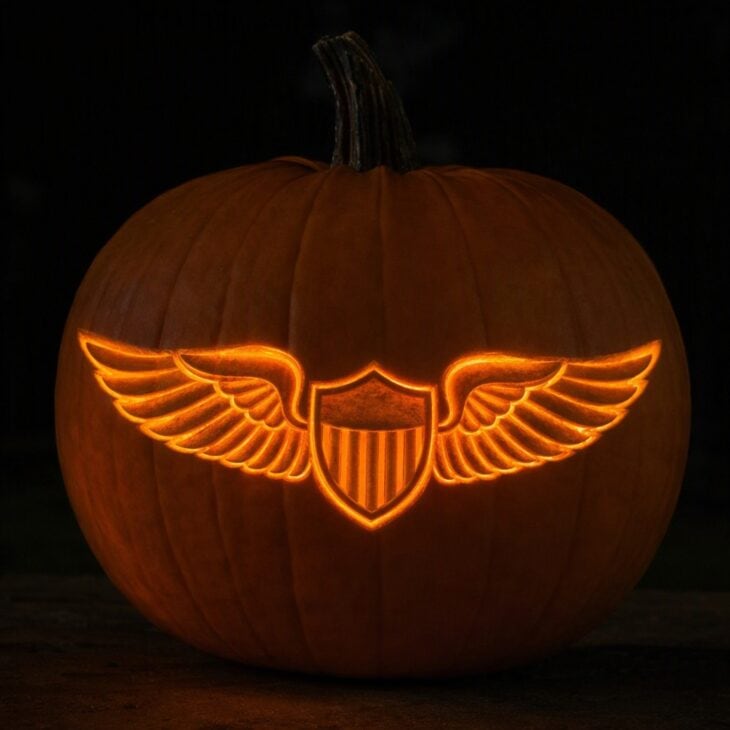
What it is A pair of outstretched wings with a center shield, carved as a shallow etching that removes only the skin rather than cutting through.
Why it works Etching leaves the pumpkin wall intact, so the badge glows softly instead of flaring bright, which makes feather lines look sharper.
How to get it Trace the wing design onto the pumpkin with a pencil, then use a linoleum cutter or a loop tool to scrape away the orange skin, about an eighth of an inch deep. The scraped areas glow amber against the unscraped skin. Practice on the back of the pumpkin first, since depth is hard to correct once it is cut.
09. Pumpkin as a Plane Fuselage
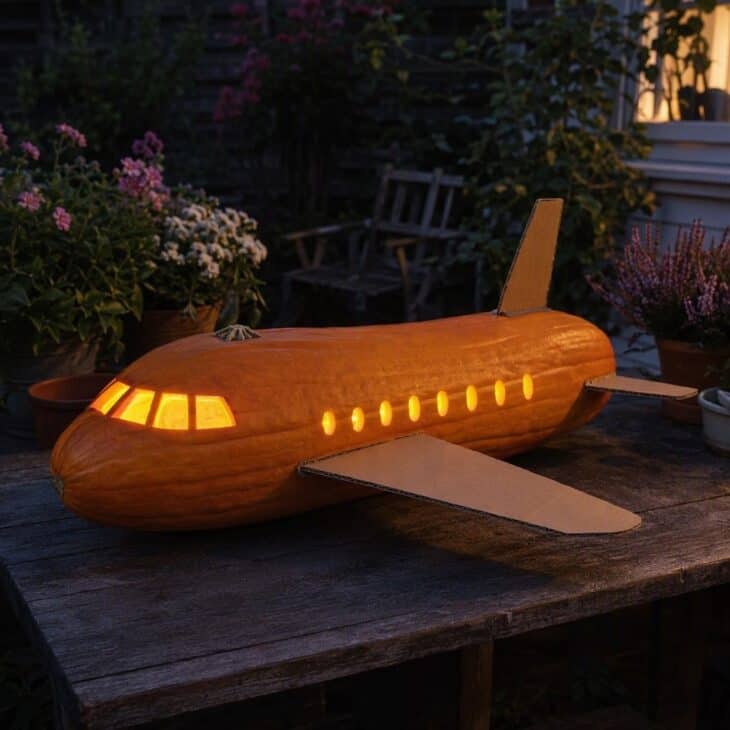
What it is A long pumpkin laid on its side as a fuselage, with a cockpit window carved at the front, a cardboard tail fin, and paper wings slotted into the sides.
Why it works Using an elongated pumpkin skips the carving challenge entirely and turns the gourd itself into the aircraft.
How to get it Choose a long, narrow pumpkin or a large butternut-shaped gourd and cut slots about a quarter inch wide on each side for wings. Cut the wings and tail from stiff cardboard, paint them, and slide them into place. Add a carved oval cockpit window at one end and set it on a base of rolled towel so it does not roll.
10. Control Tower Pumpkin
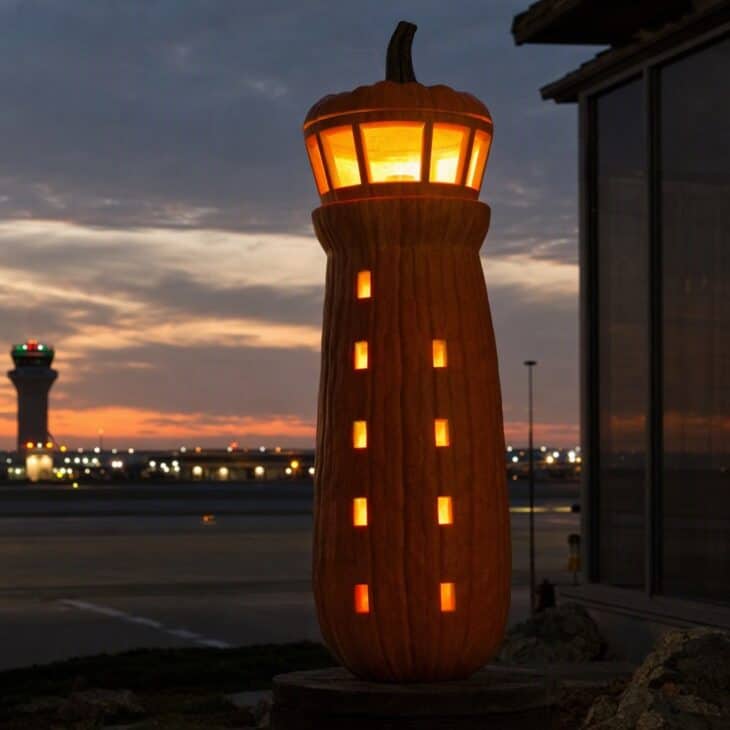
What it is A tall pumpkin carved as an airport control tower, with a wide glass cab at the top and a tapered shaft below.
Why it works A tall, narrow pumpkin already looks like a tower, and the glowing cab window is the whole effect.
How to get it Cut a wide horizontal band near the top as the glass cab and leave a thin center post, then carve a few small windows down the shaft. Add a small cutout beacon on top. A tall pumpkin with a flat top sits more steadily than a round one.
Carving safety
Use a battery tea light rather than a flame where you can. If you do light a candle, keep the pumpkin away from porch steps, curtains, and anything a costume could brush against.
11. Radial Engine Face
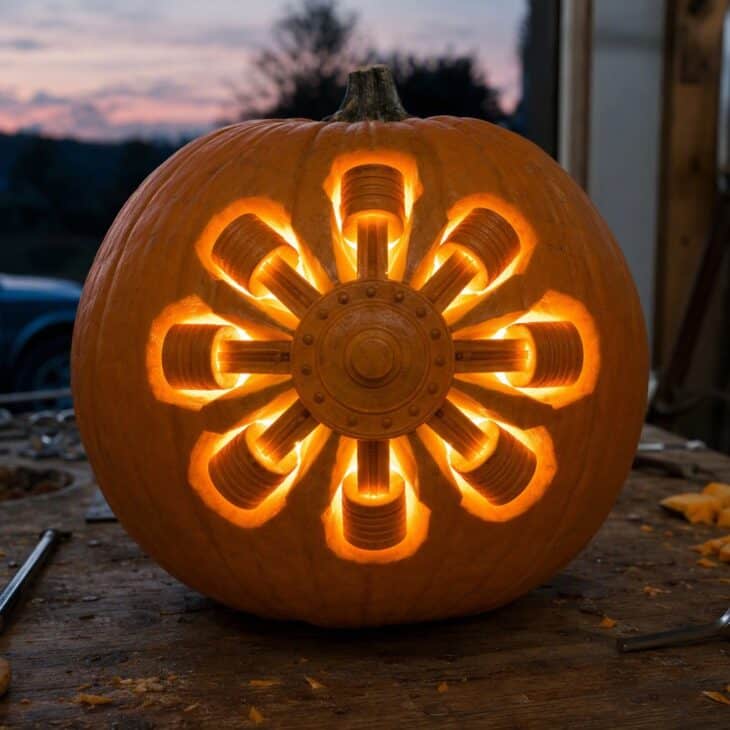
What it is A round pumpkin carved with nine cylinders in a ring around a center hub, like the front of a vintage radial engine.
Why it works A ring of equal shapes is easy to space on a round pumpkin, and the pattern looks intricate without being hard.
How to get it Mark nine evenly spaced points around the center with a pencil, then carve each cylinder as a small rounded rectangle. Carve a circle in the middle for the hub and add a tiny propeller blade stub if you like. Use a ruler or a paper wheel to keep the spacing even.
12. Runway Lights Row
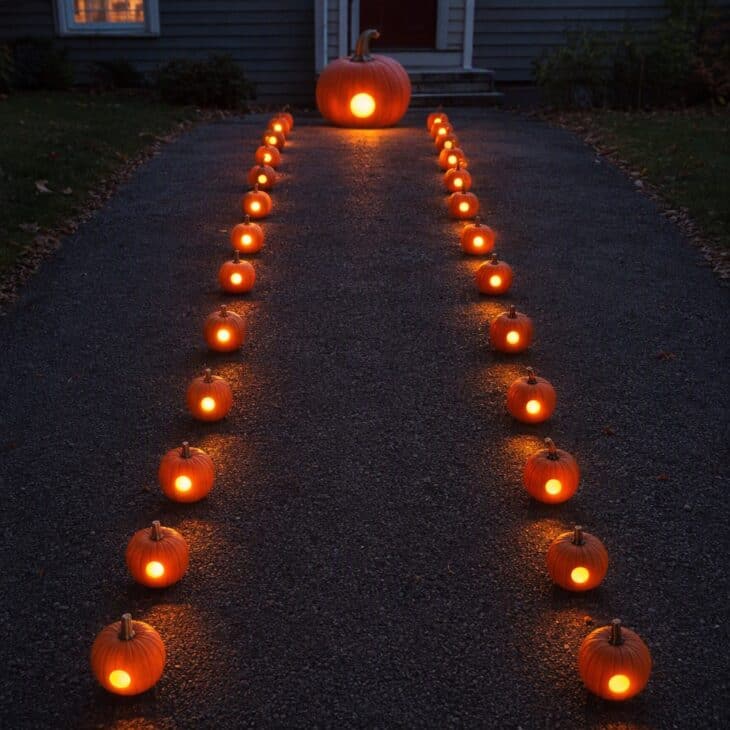
What it is A row of small pumpkins lined up like a runway, each with a single round hole, with a longer pumpkin at the end as the plane.
Why it works A line of small lights is simple to make and looks striking down a driveway or porch.
How to get it Pick six to ten matching mini pumpkins and cut a single round hole in each. Line them in two rows about a foot apart like runway edge lights. Place a battery light in each so they glow evenly, and put one large carved plane at the head of the row. The same row works on an aviation patio for a party.
13. Compass Rose Pumpkin
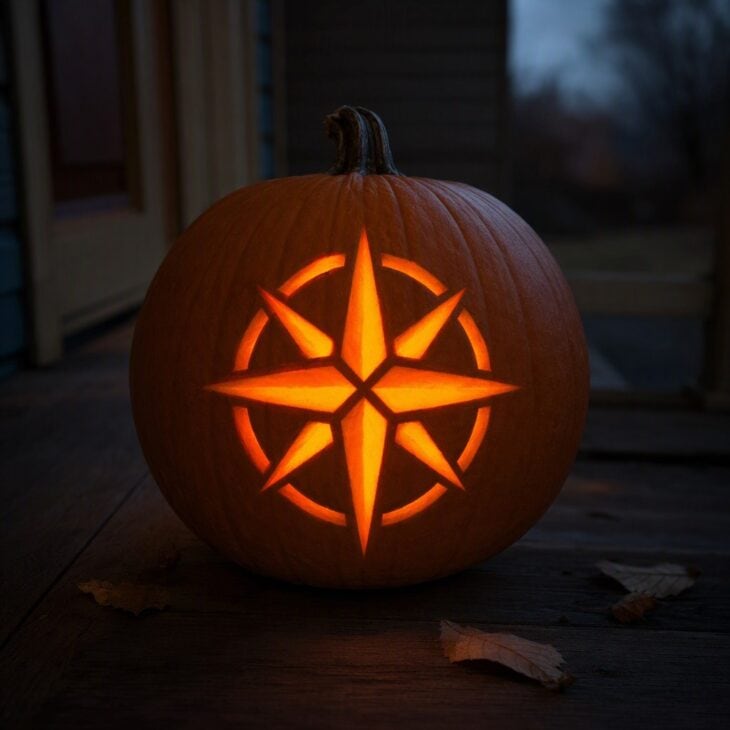
What it is A navigation compass rose with four long points and four short points, carved into a round pumpkin face.
Why it works The symmetrical star is geometric and forgiving, and it nods to aviation’s navigation roots.
How to get it Print a simple eight-point compass rose and tape it to the pumpkin. Carve the four long points first, then the short ones, and leave the center ring intact for stability. Add a small circle at the north point to mark it.
14. Airplane Window View
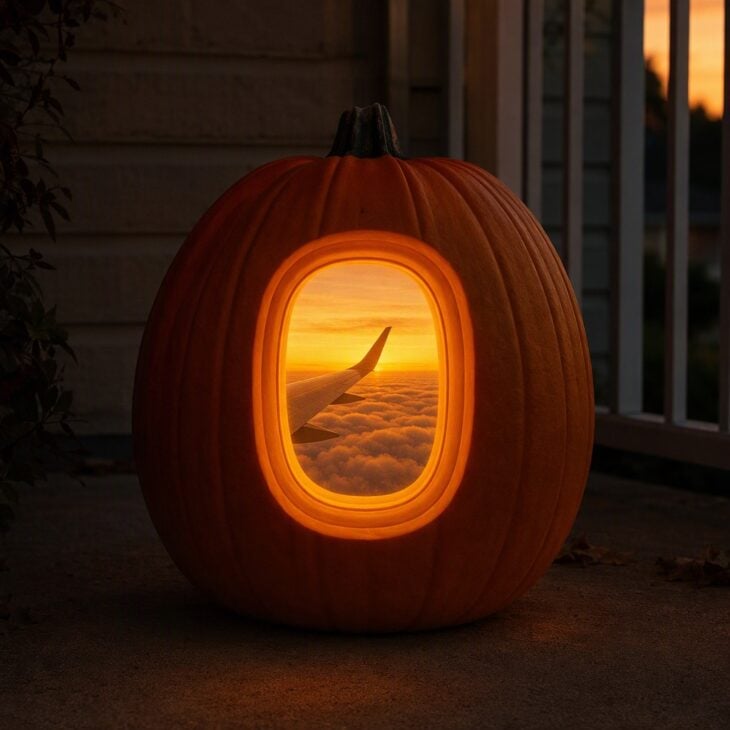
What it is An oval airplane window carved into the pumpkin, with a cloud line and a small wing visible through it.
Why it works The framed view gives the pumpkin a scene instead of a single silhouette, which stands out among typical designs.
How to get it Carve a large rounded-rectangle window shape and leave a wavy line across it as the cloud layer. Carve a small wing tip rising in one corner. Light it from behind so the cut area glows like daylight through a cabin window.
15. Parachute Drop
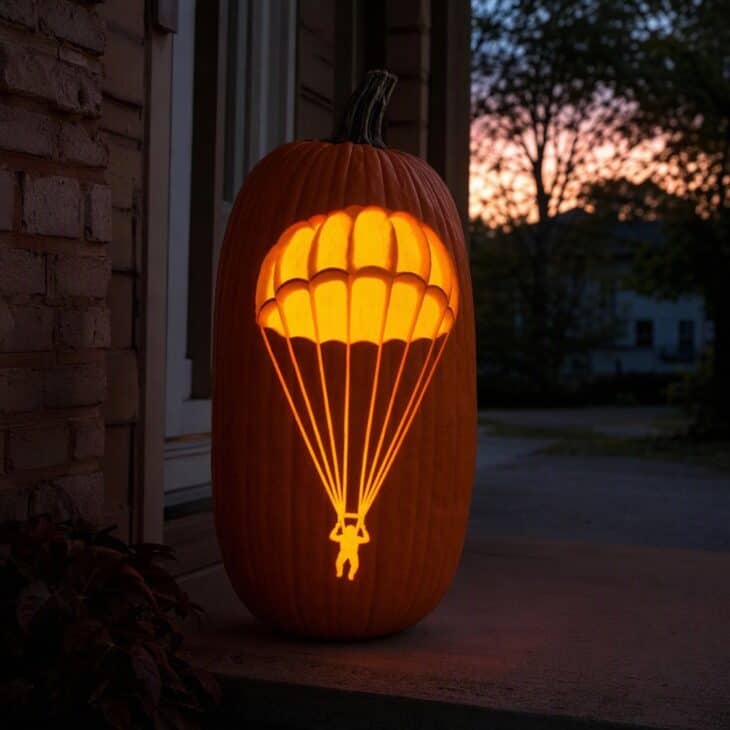
What it is A canopy shaped like a half circle with suspension lines and a small hanging figure, carved into the upper half of the pumpkin.
Why it works The long lines and open canopy add motion, and the small figure gives it a story.
How to get it Carve the canopy as a half circle with scalloped bottom edge, and draw the lines as thin tapered cuts converging to a small figure. Leave the lines connected to the canopy so they do not fall away. A stencil with chunky lines works much better than a fine drawing.
16. Jack-o’-Lantern Pilot
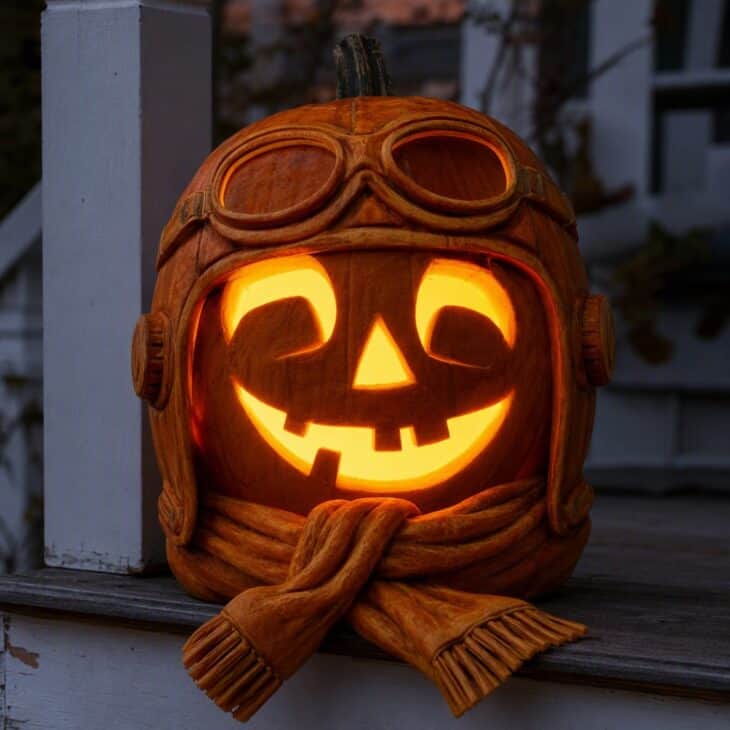
What it is A classic jack-o’-lantern face wearing a carved aviator cap with goggles pushed up on the forehead and a trailing scarf.
Why it works It keeps the traditional face everyone expects while adding an aviation twist.
How to get it Carve the triangle eyes and the toothy grin as usual, then add a cap outline above the eyes and two circles for goggles on the forehead. Tie a real scarf around the stem to finish the look. Use a pumpkin with a smooth surface for the goggles. It pairs well with an aviation Halloween costume on the trick-or-treater.
17. Glider Soaring Scene
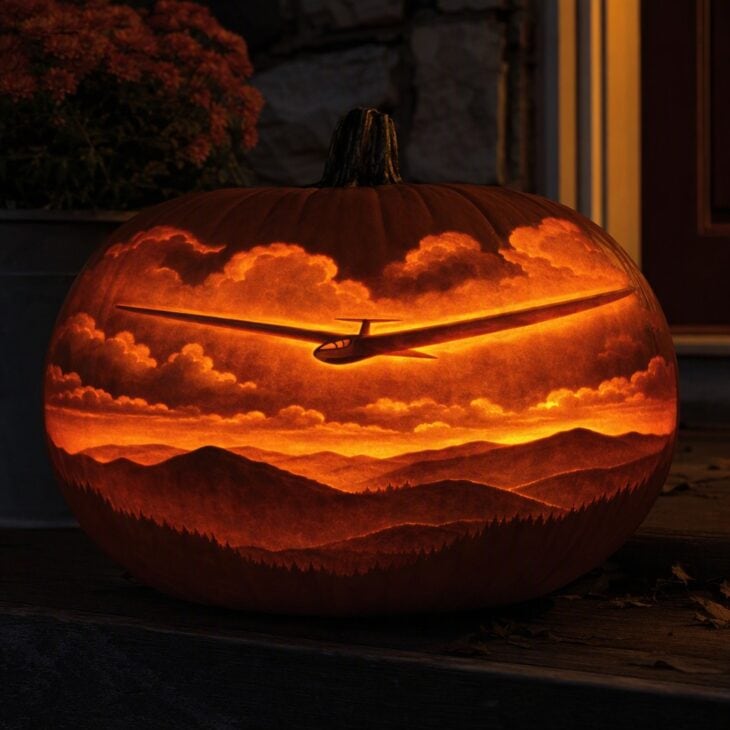
What it is A long-winged glider with a thin fuselage soaring above a row of carved hills, with a few small clouds.
Why it works The extremely long wings stretch across the pumpkin’s width and read well even in a simple cut.
How to get it Carve the glider across the widest part of the pumpkin, with thin tapered wings that keep a small bridge near the tips. Add hills along the bottom as a wavy line and clouds as scalloped shapes. Choose a wide pumpkin so the wingspan fits.
18. Mini Pumpkin Fleet
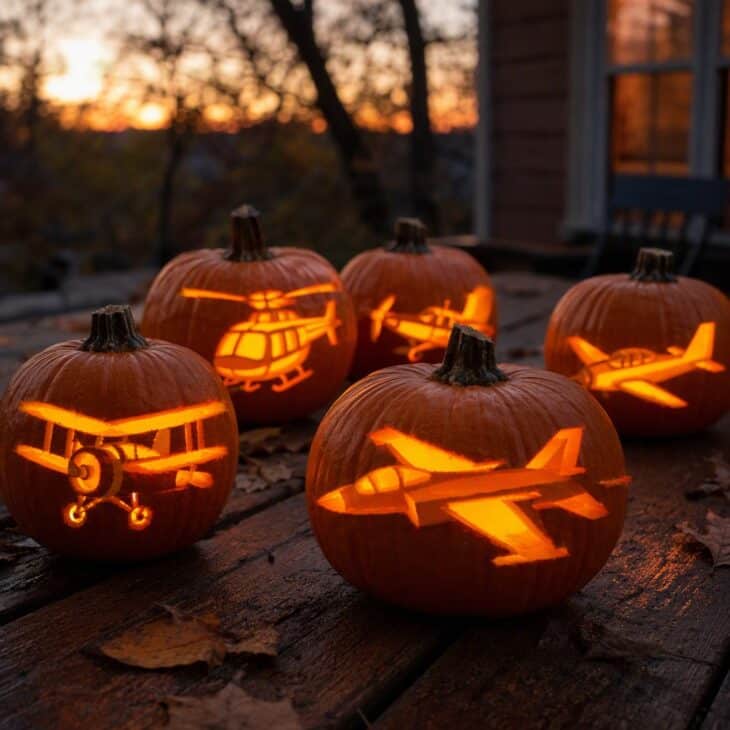
What it is A group of small pumpkins each painted or carved as a different aircraft, such as a jet, a biplane, a helicopter, and a balloon.
Why it works A varied set lets everyone pick a favorite and fills a table or stair with little effort per pumpkin.
How to get it Buy five or six mini pumpkins of similar size and give each one a simple design in paint, marker, or a quick carve. Arrange them in a staggered line on a shelf or table. Use a paint pen for fine details such as windows and propellers.
19. Contrail Sunset Pumpkin
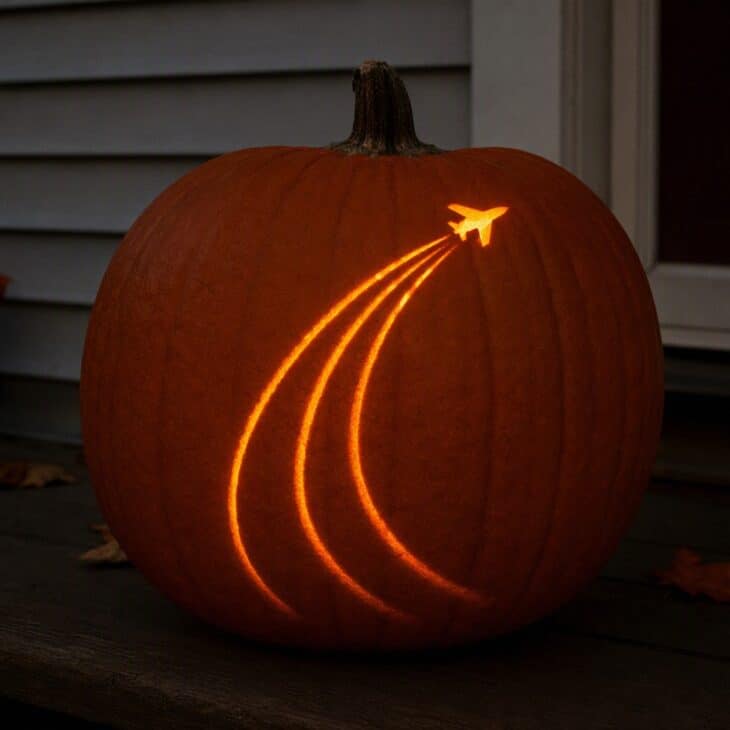
What it is A pumpkin carved with a small jet at the top and long curved contrail lines sweeping down across the face.
Why it works The long curving lines carve in a few cuts and give a sense of speed.
How to get it Carve the jet small near the top and sweep two thin curved lines behind it, tapering to nothing at the ends. Keep the lines connected at one end so the shapes stay in place. Light it with a warm amber bulb so it echoes a sunset sky.
20. Flight Path Route Map
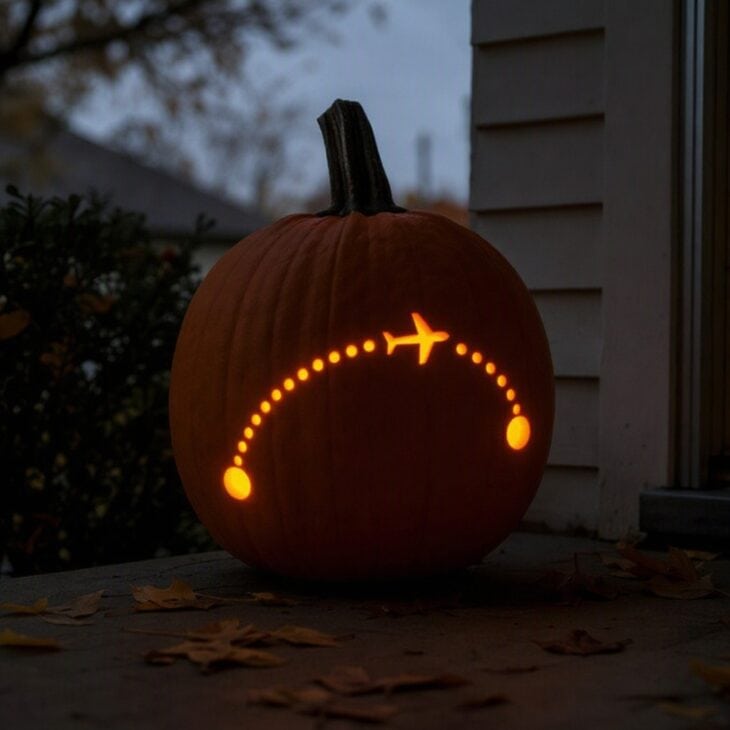
What it is A dotted arc running between two small circles, one at each end, with a tiny plane silhouette partway along the curve, drilled and cut into a round pumpkin.
Why it works It borrows the look of an in-flight route map, so it feels aviation-specific without needing any detailed aircraft shape.
How to get it Mark a wide arc across the pumpkin and drill small holes along it about an inch apart. Carve the two end points as larger circles and add a small plane cutout near the middle. Add a few drilled dots above as stars if you want a night-sky feel.
FAQ
Sources and references used for research and fact-checking.
Get the Newsletter
The latest aviation news and stories sent to your inbox.
About the Author

Hanna writes AeroCorner's aviation-lifestyle and decor guides, turning a love of flight into ideas for your home, celebrations, and gift lists.